Christmas is about to knock on your door. How have your been preparing for this celebration?
Decorations and fancy feasts are absolutely awesome, but don’t forget to add something Christmassy to hype up everyone’s mood during the special celebration. We’re here for you with a fantastic tutorial on making a Christmas video clip using the advanced Filmora from Wondershare. Last year, we’ve shown you a basic guide to make your own Christmas video using this cool program, and today post will bring you more stunning Christmassy effects updated from Wondershare to make your products more unique and professional than ever.
Other tutorials you may be interested:
- Add/replace audio in a video file
- Add stunning transitions to media files
- Trim, split, rotate and join video clips
- Add text to your video clip
- Display multiple clips in one video screen step-by-step
- How to add special effects to video
- Create Spookiest Videos With Halloween Effects
- Create a video for Halloween using Filmora
$69.99 for a lifetime license. But you can buy Filmora with coupon discount (Only $56.69) from Wondershare discount page or download free trial above (The trial version is functionally the same as the paid version except there is a watermark in the new output files.).
Other edition, Filmora 1-year license: $39.99 discount to only $37 (Discount link)
In this article:
Step 1: Download Christmas effect package (FREE!)
Go to the link: http://filmora.wondershare.com/effects-store/free-christmas-effect.shtml
Download the package for free and install it to your Filmora. After you’re done, click Launch to run the program with new Xmas effects.
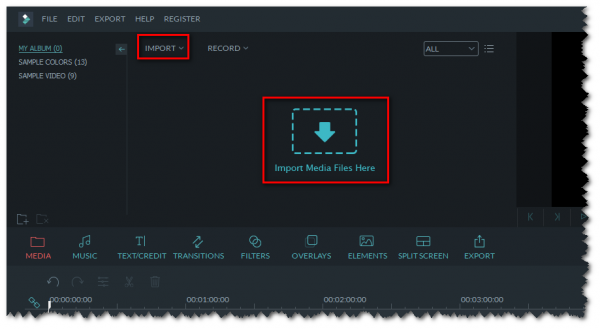
Step 2: Import your files to Filmora
On the main panel, you click either Import button or Import Media Files Here in MEDIA section. Your files can be videos or photo collection as your preference.
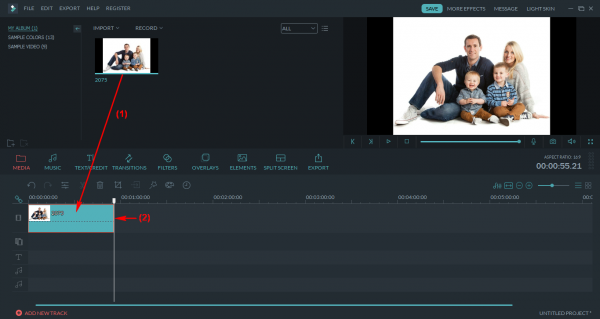
Click and drag your media file(s) to timeline (1). Trim the file (2) to cut or extent its length as you wish.
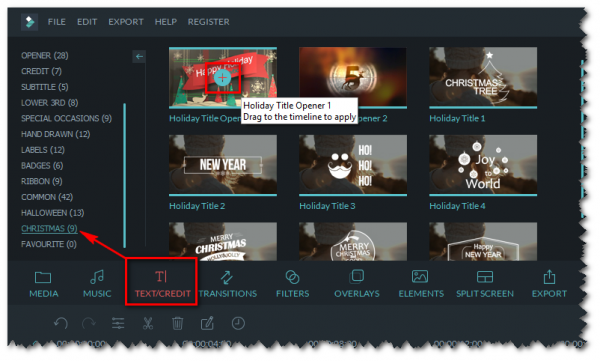
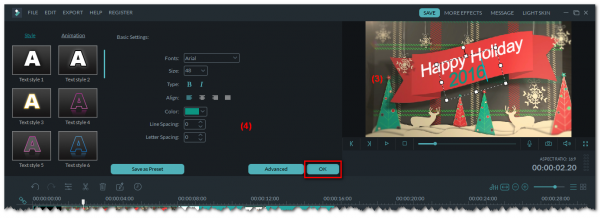
Step 3: Add opening text
Click TEXT/CREDIT tab >> Christmas. Double-click on the text you like (or click on + button in the middle to select it.
On the Preview section, double-click on the text start editing it (3) >> Text editing section will instantly appear on the left (4). Change the font, size and color of the text and click OK to apply it for your intro clip.
Step 4: Apply Christmas effects to you media file(s)
# CHRISTMAS MUSIC
Go to MUSIC tab to see Filmora’s Christmas music library (5). Click on the + button (6) or click and drag your favorite music to Timeline (7).
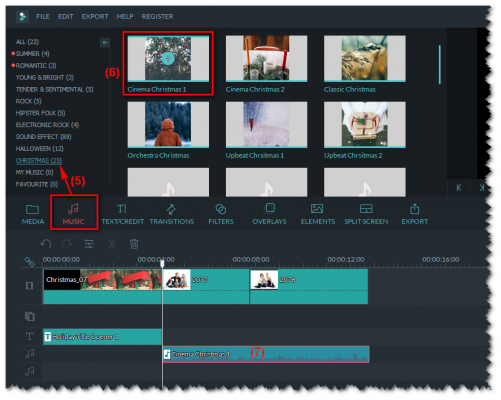
Play to preview.
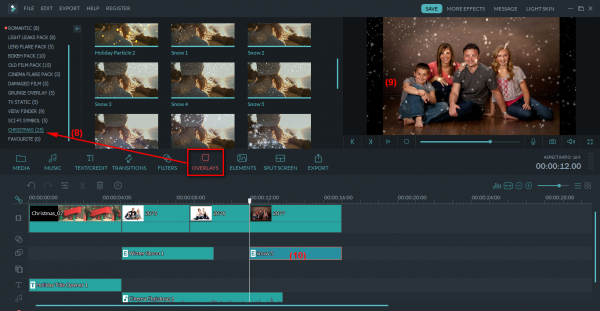
# CHRISTMAS OVERLAYS
Go to OVERLAY tab >> Christmas (8). Click on the effects to preview (9) them and drag to timeline to apply it for your file (10).
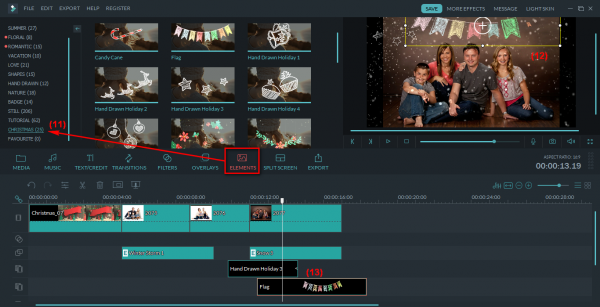
# CHRISTMAS ELEMENTS
Got o ELEMENT tab >> Christmas (11). Follow similar steps with previous effects (13). On Preview section, click on the element chosen to resize and drag it to the position you like (12).
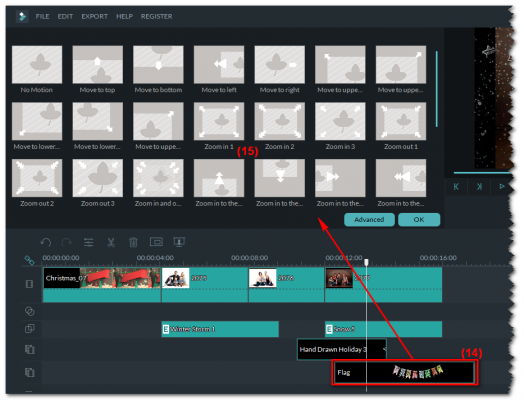
# ADVANCED EDITING FOR THE EFFECTS
In timeline, all effects can be modified further. You simply need to double-click on it (14) >> an editor for that effect will be shown instantly (15).