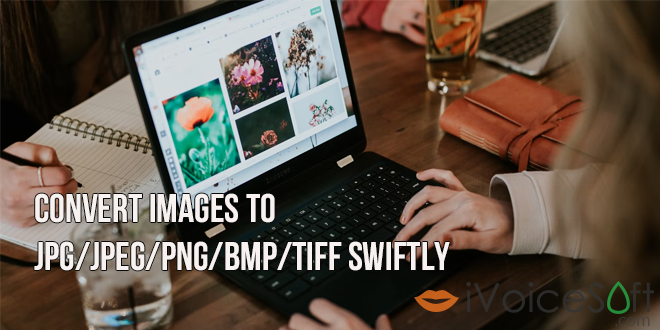
Are you looking for a hassle-free solution to convert images to popular formats like JPG, JPEG, PNG, BMP, and TIFF? Look no further than the powerful image converter function of Wondershare UniConverter software. With the help of this flexible tool, you may convert numerous files at once because it allows batch processing. It offers mass converting simplicity along with the flexibility to change the height and width of your photographs as needed. Also, you have editing choices to improve and customize your photos, such cropping, adding watermarks, and adding effects.
Here’s a step-by-step guide to converting images effortlessly using Wondershare UniConverter:
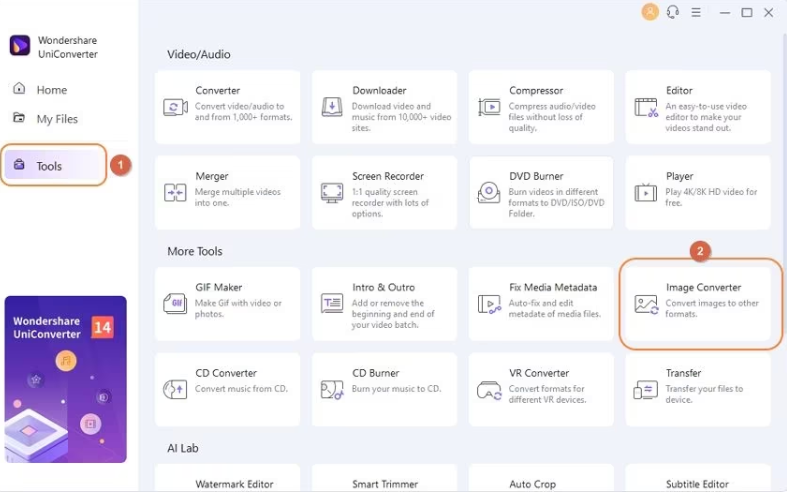
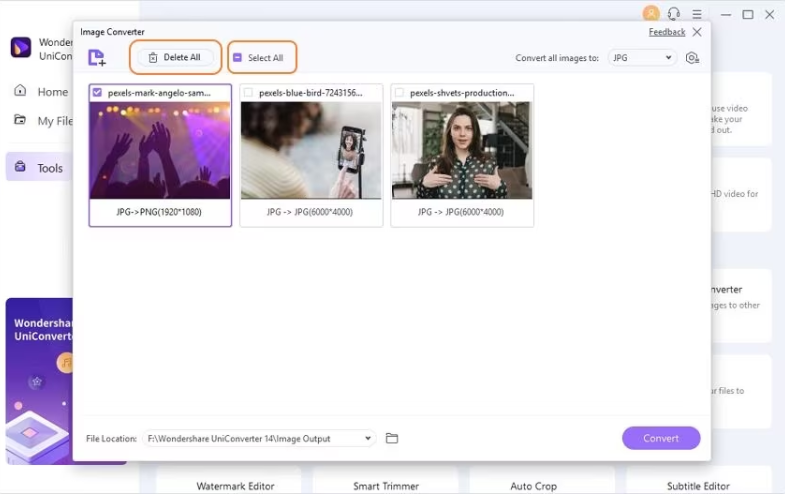
Step 1: Launch Image Converter
Begin by launching the Wondershare UniConverter software on your computer. Navigate to the Tools menu and select the Image Converter option.
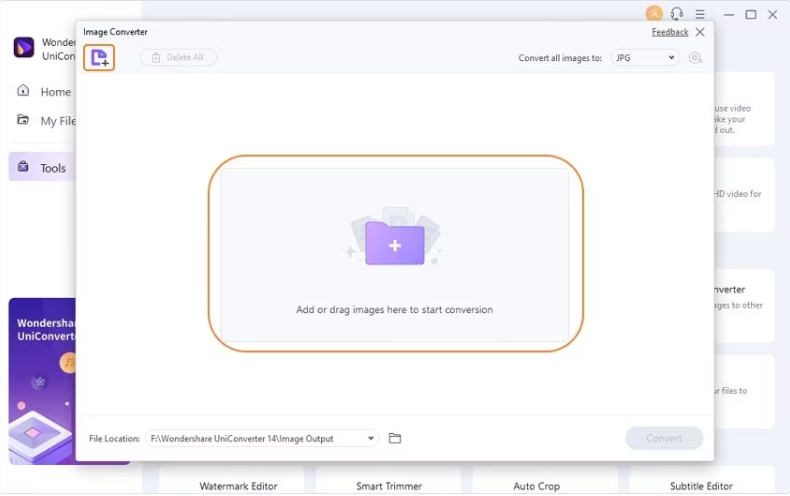
Step 2: Add Images for Conversion
Import your local images to be converted by clicking on the file icon or using the + button. Alternatively, you can streamline the process by dragging and dropping the files directly into the program.
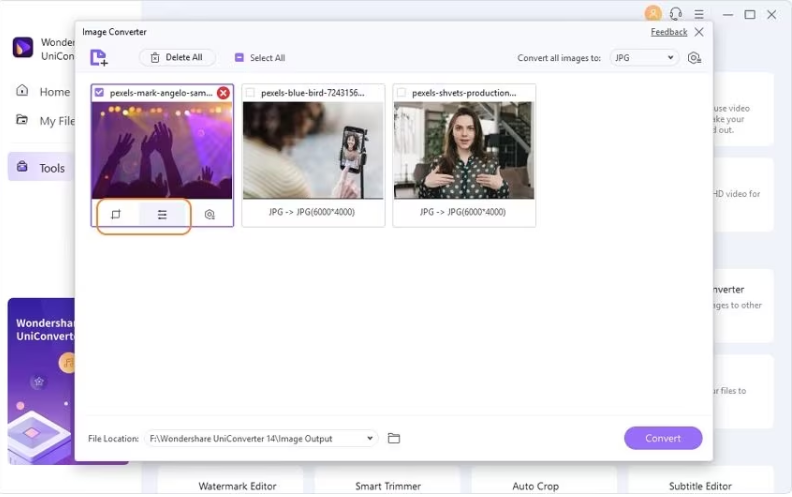
Step 3: Edit Images and Adjust Parameters
Preview the added images on the software interface, and access various options such as Preview, Open File Location, Delete, Clear Converted Task, and Attribute by right-clicking on the image.

Customize your images by cropping, rotating, adding effects, or applying text or image watermarks using the editing icons under the thumbnail image.

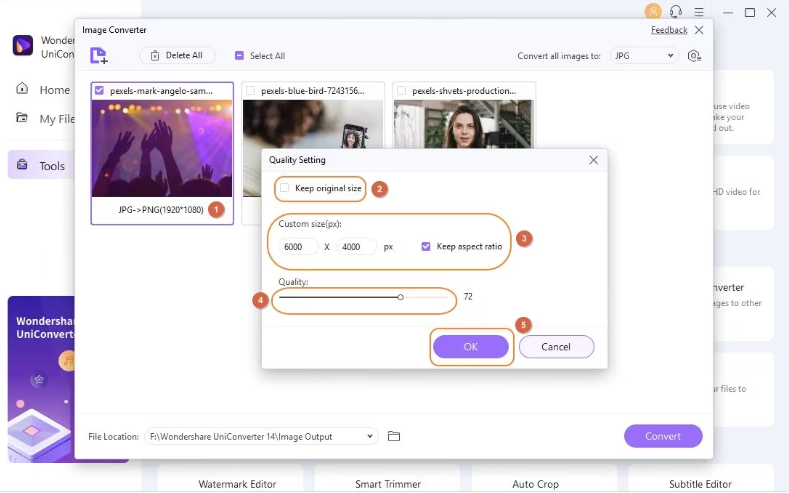
To modify parameters, click on the Settings icon, disable the “Keep original size” checkbox, and choose the desired width and height. Maintain the aspect ratio if needed, and confirm the settings by clicking the OK button.
Use the Select All checkbox to choose all added images or individually select files for deletion.
Step 4: Choose Target Format and Convert Images
Expand the drop-down list at Convert all images to at the top-right corner, and select the desired target format. Select the system location in the Output tab where you want to save the processed files.
Finally, click on the Convert button at the bottom-right corner to start with the image conversion process.
Experience the ease and speed of image conversion with Wondershare UniConverter – your go-to solution for converting images with precision and convenience.
🔥 Get Wondershare UniConverter Now at a Whopping 30% Off!
Limited Time Offer! Act Fast and Unlock the Power of Conversion Today!
FAQs
1. How do I transfer converted or downloaded video to my device?
Step 1: Navigate to the [Transfer] feature. For Windows users, access it in [Toolbox]. Mac users can find Transfer on the left sidebar.
Step 2: Connect your mobile device.
Step 3: Add files by clicking on the + Add Files button. To add folders, click the ▼ icon next to + Add Files and select Add Folders.
Step 4: Hit Transfer All to transfer all files to your connected device. Access the transferred files in your device’s default Videos/Music app.
2. How to use High Speed Conversion?
Ensure both input and output file formats are supported by our software. Input formats: MKV, AVI, MPG, TS, TRP, MP4, M4V, M2TS, MTS, MOV, FLV. Output formats: MKV, AVI, MP4, M4V, MOV. Output formats for devices: iPhone X, 8, 7, 7 Plus, 6s, 6s Plus, 6, 6 Plus, 4s, 4, iPod Touch 4, iPad, iPad 2, The New iPad, Apple TV, Apple TV 2, The New Apple TV, PS3, XOOM, Flyer, PlayBook, Galaxy S, Captivate, Galaxy Tab, Galaxy S II, Galaxy S III, Galaxy S4/5/6, Galaxy Note, Galaxy Nexus.
Enable High-Speed Conversion at the bottom of the Convert tab. A window will appear, click “Turn on.” Then, click Convert to initiate automatic utilization of High-Speed Conversion technology for your file.
3. How to convert a DRM protected file?
Regretfully, copyright limitations prevent our software from enabling the conversion of DRM-protected files.