Wondershare UniConverter enables you to convert videos from one format to another. After launching the software, you can complete the task with the following steps.
In this article:
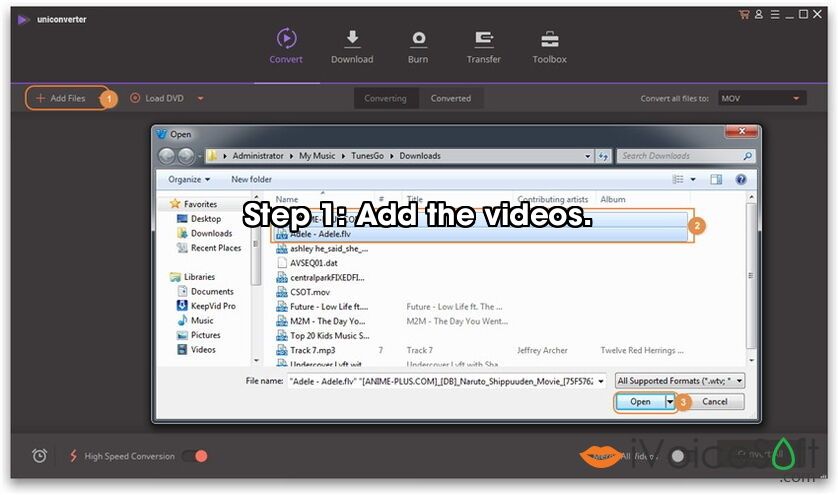
Step 1: Add the videos.
Get the Wondershare UniConverter with discount HERE >>.
Before you start, you need to add the videos to Wondershare UniConverter.
1. Go to the Converting tab of the Convert section, then click the Add Files button at the top-left corner.
2. A File Explorer dialog box will open from where you can select the files you want to convert.
3. Click the Open button to add the files.
Step 2: Choose the output format.
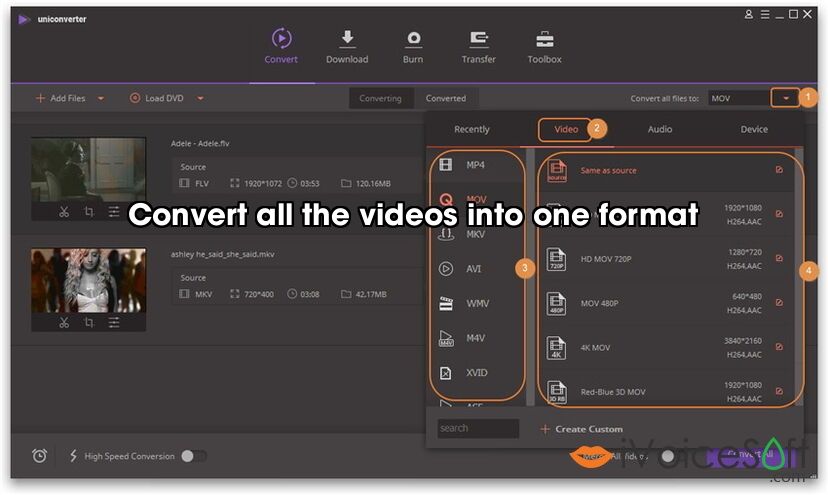
Solution 1: Convert all the videos into one format
1. Click the drop-down icon at the top-right corner of the window to enter the drop down list of the output format.
2. Click the Video tab to enter the interface which lists all of the video output formats.
3. Select the output format for the files, for example MOV.
4. A list of presets appears on the right side of the format. Here, you can choose the preset without a specified resolution to convert with the original resolution by default, or choose a different resolution for the files, double-click it. Then, the selected output format will be shown at the right side of the Converting window.
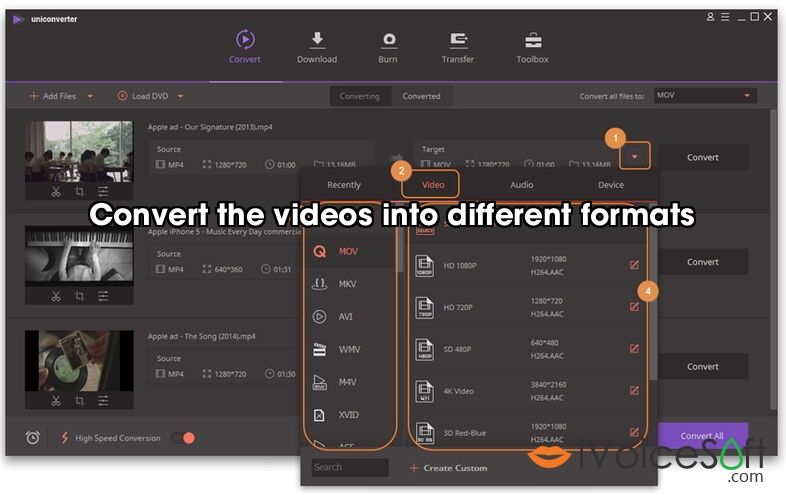
Solution 2: Convert the videos into different formats
- Click the drop-down icon Inverted triangle icon beside the video below to enter the drop down list of the output format.
- Click the Video tab to enter the interface which shows all of the video output formats.
- Select the output format for the file, for example MOV.
- A list of presets appears on the right side of the format. Here, you can choose the preset without a specified resolution to convert with the original resolution by default, or choose a different resolution for the file, double-click it. Then, the selected output format will be shown at the right side of the Converting window.
- Loop to the above steps (Step 1 to Step 4) to set other videos’ output formats.
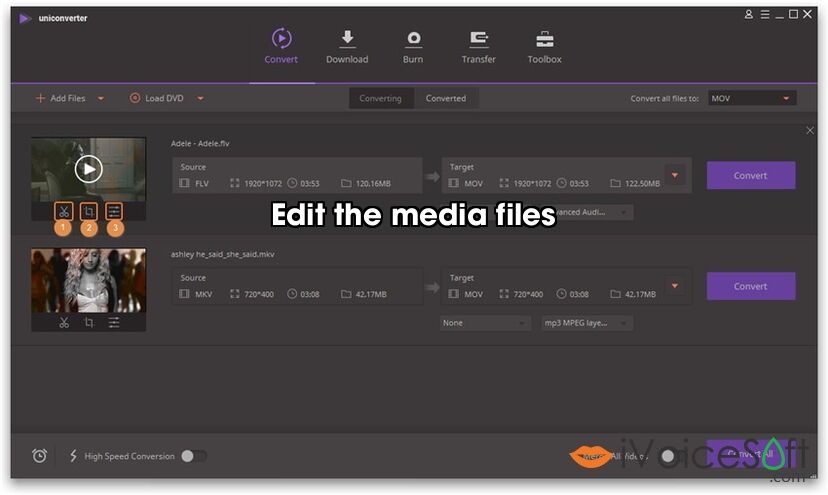
Step 3: Edit the media files (optional).
If you want to edit converted videos before the conversion, you can click one of the three buttons listed as below to edit your videos.
- Trim your video.
- Crop your video.
- Apply effects, add watermark, add subtitles, adjust volumes for your video.
See more about how to edit video >>
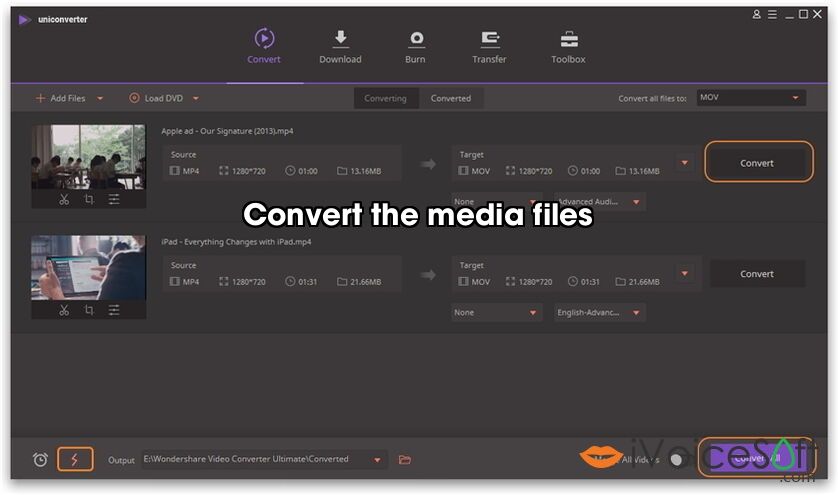
Step 4: Convert the media files.
Finally, click the Convert All button in the bottom-right corner to start processing the files. Or you can click the Convert button at the right of each video to convert the related videos one by one.
Tips: You can turn on the switch High Speed Conversion to speed up the conversion.
Step 5: Find the converted videos.
Method 1:
After the conversion completes, you can tap the folder icon folder icon at the bottom of the main interface to open the output folder.
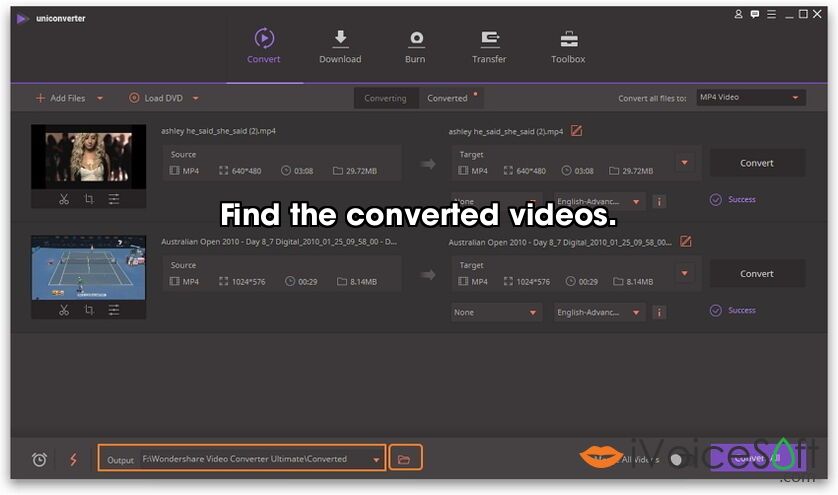
Tips: You can change the output folder directly at the bottom of the main interface by clicking the inverted triangle and browsing the target folder.
Method 2:
- After the conversion completes, find the converted files in the Converted tab of UniConverter.
- Click the folder icon folder icon to open the output folder from where you can find the converted videos.
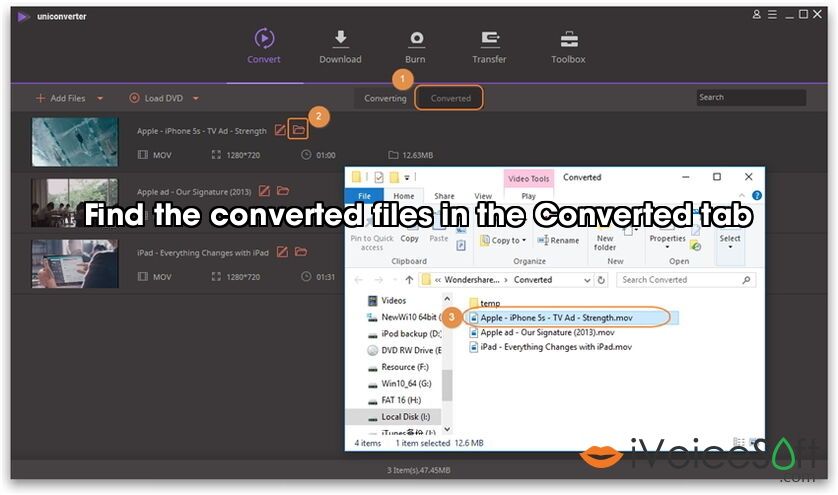
Tips: You can change the output folder by clicking Menu > Preferences > Location to enter the Location tab and change the path.
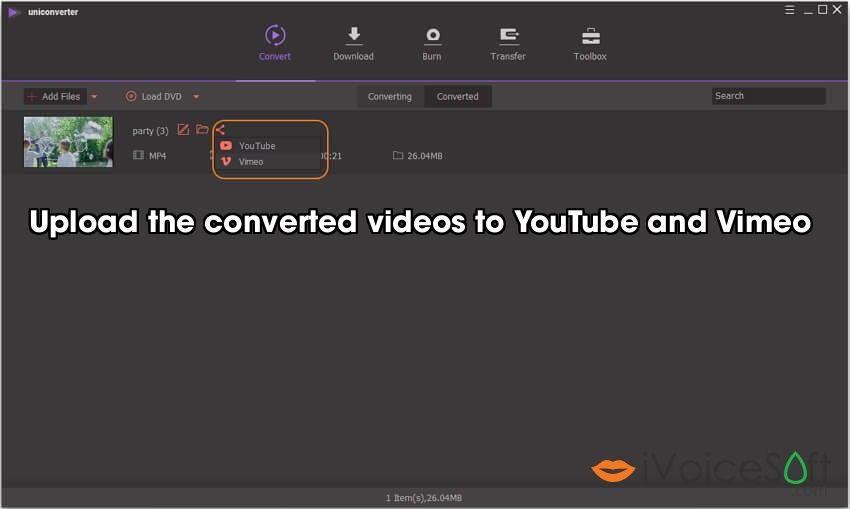
You can upload the converted videos to YouTube and Vimeo directly after the conversion fromUniConverter . Click the Share icon and you can see the YouTube and Vimeo option, choose one to share your videos.
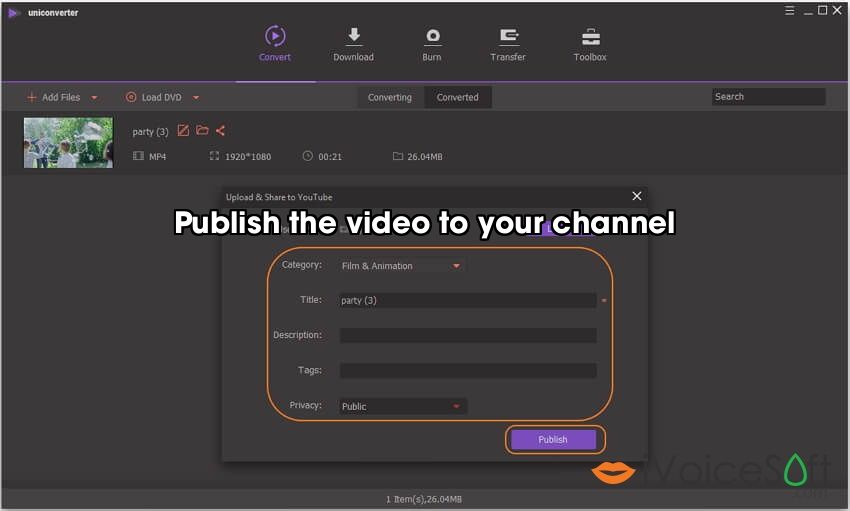
You’ll get an Authorize window, choose the Allow option and log in your YouTube or Vimeo account. After that, you’ll back to Wondershare UniConverter and see a pop-up window, from where you can choose video category, edit video title, description, tags, and privacy. After all information completed, click on the Publish button to publish the video to your YouTube channel or Vimeo account.
Now, We suggest the discount of UniConverter at the Wondershare daily promotion page HERE >>