Are you ready to elevate your video editing game without breaking the bank or straining your neck? Look no further than Movavi Video Editor 2024! Say goodbye to expensive VR headsets and hello to effortless sticker motion tracking that will make your videos pop like never before.
With Movavi Video Editor, you can add dynamic elements to your videos with ease. Whether you’re filming a recipe tutorial or any other creative endeavor, the possibilities are endless.
In this article:
Step 1: Download and Install Movavi Video Editor 2024
Download the installation file, seamlessly install the app on your computer, and kickstart your creative journey.
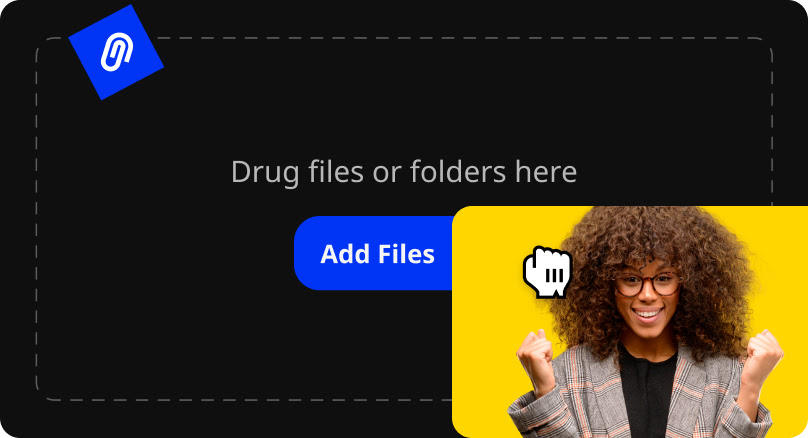
Step 2: Add Your Video
Once installed, click the “Add Files” button and select the video you want to edit. Drag it onto the Timeline for easy access.
Step 3: Add Your Stickers
Navigate to the Elements tab, effortlessly drag and drop your preferred sticker onto the Timeline above your video. Customize its size and position as per your creative vision.

Step 4: Utilize the Motion Tracking Tool
In the sticker settings, access the Motion tracking tab and choose from three tracking options: Quick, Precise, or Artificial Intelligence. Position the frame over the object you want to track and click “Track.” Preview the results in real-time.
For text pinning: The process is identical. Go to the Titles tab, place your title on the track above the video, access its settings, switch to the Motion Tracking tab, and pin the title to your object. Click “Track,” review the outcome, and if satisfied, click “Apply.”
Step 5: Save Your Edited Video
When you’re happy with your edits, click “Export” to save your video. Customize the export settings to your preference and click “Start” to begin the export process.
You may easily produce fascinating content with Movavi Video Editor 2024 at your disposal. Unlock the full power of AI, have access to many templates, effects, and transitions, and produce films that are truly remarkable.
🔥 Don’t miss out! Get Movavi Video Editor now for 40% off! Create stunning videos with ease. Limited time offer, act fast!
FAQs
1. How many computers can I install Movavi on?
You are allowed to install Movavi on one computer per license. The licensing is based on a per-computer basis rather than per user, site, or company. If needed, you have the flexibility to move the program to a new computer as many times as necessary.
2. Is Movavi good for beginners?
Movavi Video Editor is an excellent choice for beginners. You don’t need any prior skills to grasp its user-friendly drag-and-drop functionality.
3. Is Movavi good for YouTube?
Movavi Video Editor is highly recommended for YouTube content creators seeking a user-friendly yet robust video editing solution. Experienced editors will find its vast feature set appealing, but novices will find its user-friendly interface appealing.