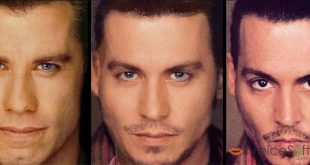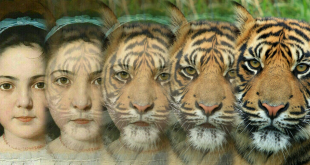
When morphing images, it’s critical to detect key elements (for examples, eyes, nose, mouth, etc.). Fantamorph from Abrosoft is a fantastic photo morphing software program that serves you for both the demands of entertainment and profession. Check out our full review for Fantamorph here!
Abrosoft FantaMorph has 3 editions (Compare FantaMorph’s Editions)
FantaMorph Standard: $29.95 – $20.97
FantaMorph Professional: $59.95 – $41.97
FantaMorph Deluxe: $99.95 – $69.97
Note: This promo price may be changed in the future. But don’t worry. We daily update discount with the best price. So please visit FantaMorph discount coupon page to get new linked-coupon if you cannot use above link.
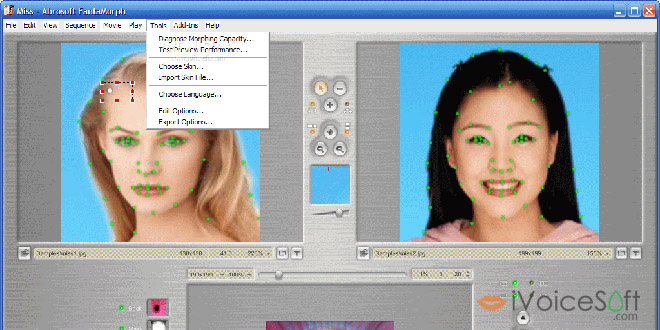
Fantamorph features an amazing ability to identify key dots in a photo so that it will be able to define how the morph process will operate accurately. In this tutorial, we will guide you how easy it is to edit these key dots to make your photo morphing task so much simpler.
In this article:
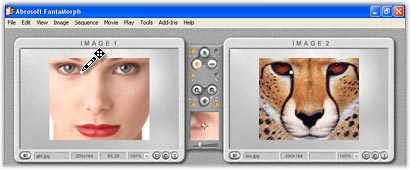
Step 1: Import source images
Double-click on Fantamorph icon on your desktop to run the program.
Once it’s open, click File >> New Project Wizard… >> Create a new project >> Next.
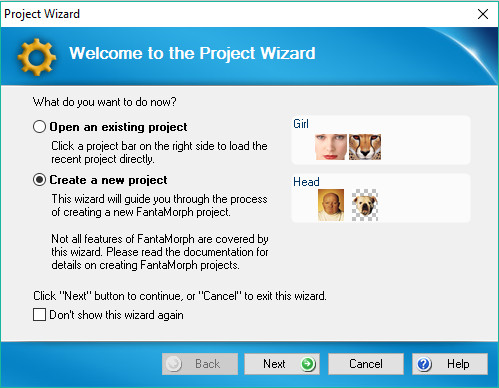
Morph >> Next.

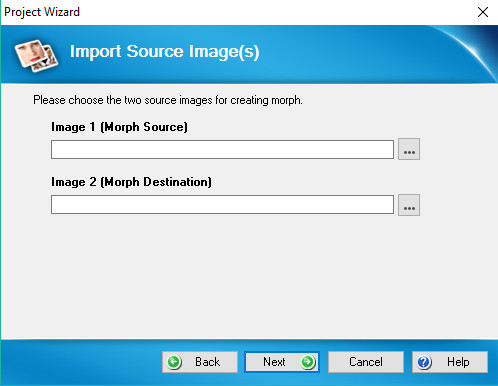
Browse for your source images >> OK.
Step 2: Place key dots on both source images
After import 2 source images, you need to place key dots on both of them in order to define how the morph process will operate.
Click (1) to Add Dot, then click on the spot considered as critical for your photo morphing process (In this example, we select the corner of the eye (2)).
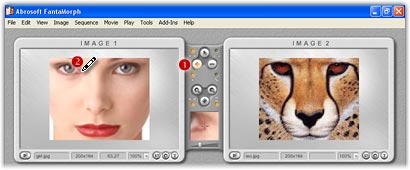
Once you place a dot on the first image, there will be a corresponding dot appearing on the second one. Depending on the size of the source images and how they are imported to the program, you yourself may need to adjust the corresponding dot to a suitable position.
To adjust a dot’s position, hover the mouse to the corresponding dot in image 2, you’ll see a 4 way arrow to indicate that it can be dragged to a new position.
![]()
Tip:
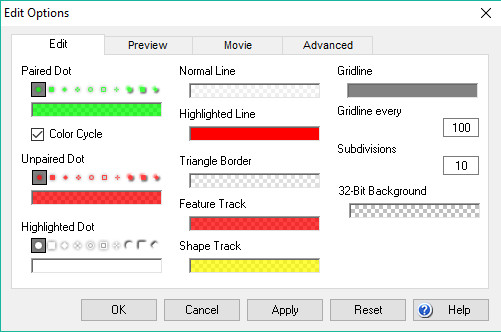
- Note that key dots are critical for the morphing process so you’re free to place as many dots as you wish to define the shape of an object more clearly.
- All dots are the same color by default. You can turn on the “Color Cycle” switch from the Tools >> Edit Options menu, then 8 basic colors will cycle across the dots. This feature helps you to distinguish corresponding dot pairs more easily.
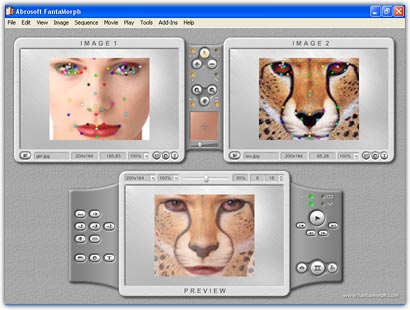
Step 3: Preview the new morphed image
After you’re done with placing the dots, you’ll see the two images are much aligned. The more dots placed, the better alignment they will be. Click Play to preview your result.
>> Next: How to Morph a Series of Images in One Minute