EaseUS Data Recovery Wizard WinPE Edition is designed for data recovery when your computer failed to boot. You can create WinPE bootable disk to recover your lost files with it. (e.g. mistakenly deleted data on C drive or performed an accidental system recovery).
Since operations on C drive usually creates temp files, and these files would overwrite the lost data you are searching for, this makes you under a high risk of data being permanently lost if you directly start data recovery procedure in Windows.
However, with Bootable Media, you are able to recover data from a totally different environment which can prevent any further damage from happening in this kind of case. This article will tell you how to use this edition to recover data.
Tips: Be sure that you have a CD/DVD-Recorder and a CD/DVD or USB drive which can be written first.
In this article:
Step 1: Burning a WinPE bootable device
A writable CD/DVD, USB flash drive and external drive are all possible for creating the bootable device.
Launch EaseUS Data Recovery Wizard WinPE Edition by Running the EXE file downloaded after purchase, and select the device you want to create a bootable disk with, click Create to finish the step.
EaseUS Data Recovery Wizard WinPE Edition will recognize your CD/DVD device or USB drive automatically.
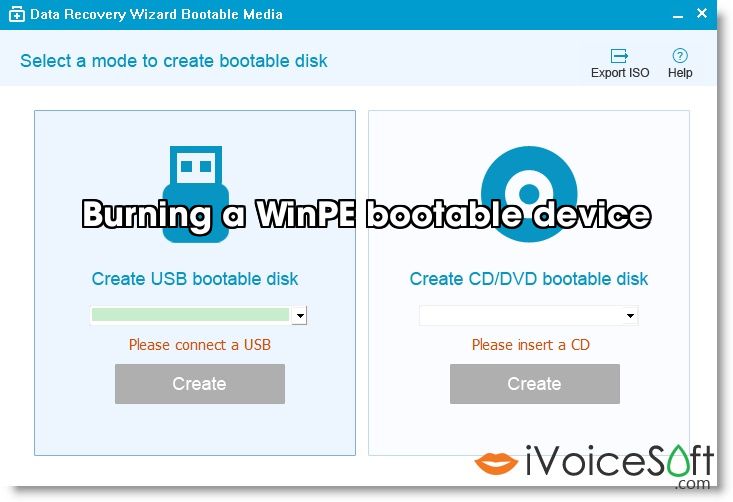
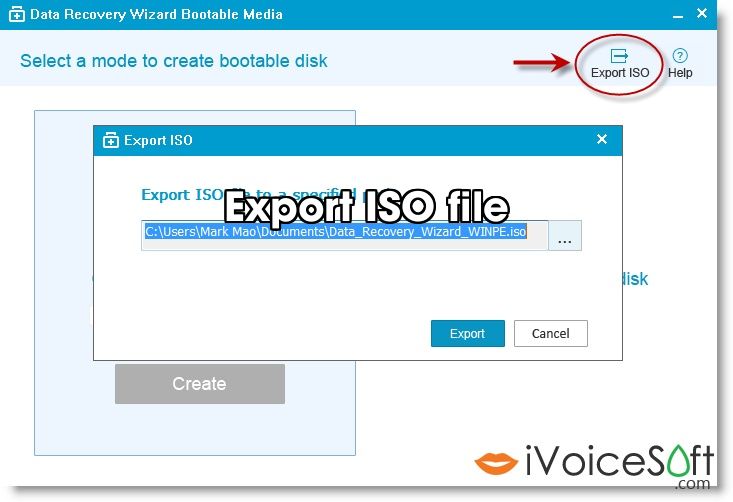
You are able to Export ISO file, then use the other burning tools to create the bootable media.
Step 2: Changing BIOS boot order
You need to place CD drive or USB-HDD in the first location of your boot queue in order to load from the bootable device just created.
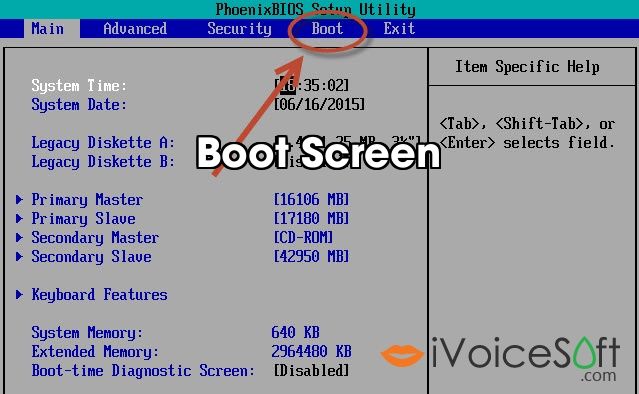
For the most time, this can be configured in BIOS setup utility. You can press F2 (for a laptop), Del (for desktop) or a specified key in your brand computer to log in the utility.
Below is a kind of BIOS setup utility, yours may look like this or it may look completely different. But no matter how your BIOS setup utility appears, they are all basically a set of menus.
All you need to do is just find out where the boot menu. Then change your computer boot sequence. Move “Removable Devices” (bootable USB disk) or “CD-ROM Drive” (bootable CD/DVD) beyond Hard Drive. Then save and exit.

Step 3: Recover data
Restart your computer and run EaseUS Data Recovery Wizard from WinPE bootable disk.
After WinPE bootable disk loaded, follow the guide to start data recovery.

Add Device Driver can help you add the driver of your device under WinPE environment, as some specific device cannot be recognized under WinPE environment without driver installed, such as RAID or some specific hard disk.
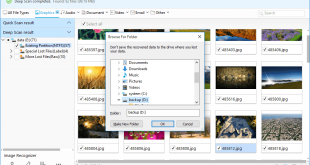
You just need to make some simple choice which file type to recover and where to scan in the whole data recovery wizard, and then our product will start the scan and show you what it has found.
There is no free trial for this edition, if you need to recover data from a failure OS, you need to order it first. Follow our coupon code to get the discount for EaseUS Data Recovery Wizard