In todays’ tutorial, we will show you a 3-step guide on how to make a recording in APE format. The tool of our choice is AV Voice Changer Software Diamond 9.0 from Audio4fun.com .
In this article:
Why *.APE?
It should be noted that APE format (also known as Monkey’s Audio) is one of the most popular music formats, which uses lossless compression. This format is freely available to users with plug-ins for playback on most popular media players. Main advantages:
- Very good compression ratio.
- Very good support for a wide range of programs for Windows.
- Fault tolerance (short, sharp sound in the place of error).
Before we get started, make sure you have the “assistant” software AV Voice Changer Software Diamond installed on your PC. If you haven’t, click this button to get the latest version 9.0 now.
Note: You can buy Voice Changer with 30% discount or free get Voice Changer Software Diamond activation code now
Step 1: Set up your cool voice (optional)
Run AV Voice Changer Software Diamond 9, turn on Voice Morpher feature (1) on the right panel.
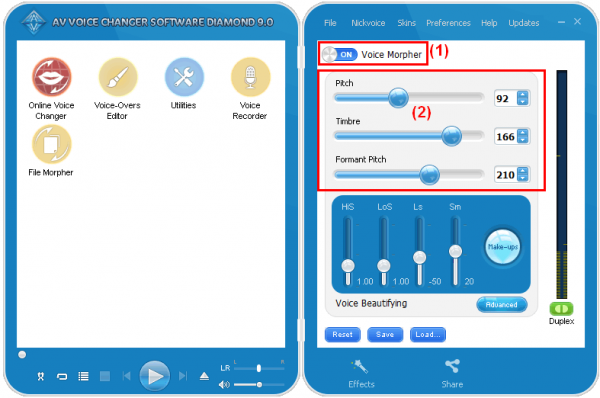
The 3 big sliders (2) allow you to modify your own voice timbre, pitch and formant pitch, which are the most basic and important vocal parameters of human voice. To understand how to use this, check out our step-by-step tutorial here.
Step 2: Start recording with Voice Recorder
On the left panel, click on Voice Recorder button.
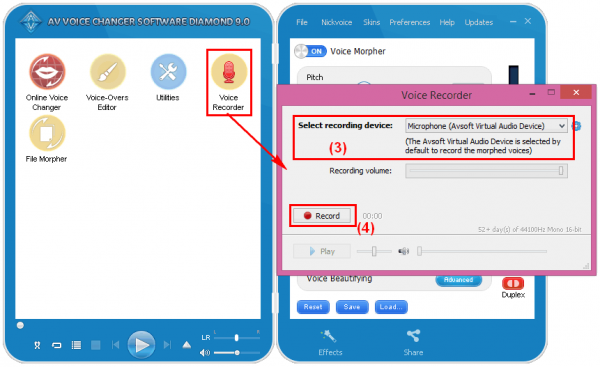
Set Microphone (Avsoft Virtual Audio Device) (3) as your main audio driver so that all morphing configurations set will be applied automatically to your recording. When you’re ready, click Record (4) to start recording.
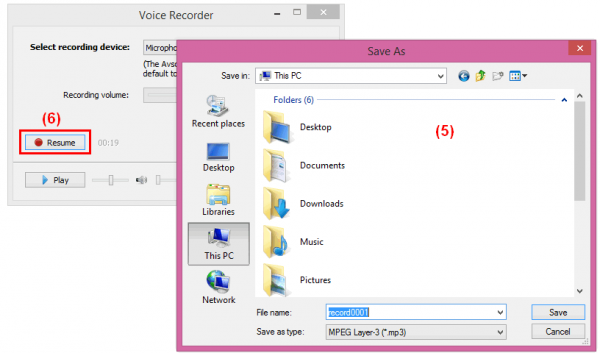
Once you’re done, click Stop >> Save As (5) window will instantly pop up >> Choose location folder to save your recording. In case you still want to add more lines to the recording, close Save As window and click Resume (6) to continue.
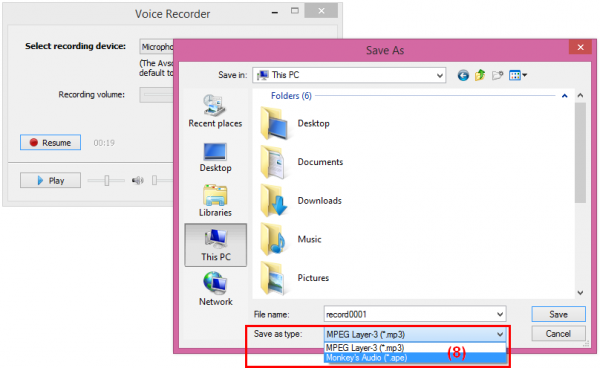
Step 3: Save file in *.APE format
In Save As window >> Select Monkey’s audio (*.ape) as output format type (8) >> Save.
HAVE FUN!