Do you believe creativity matters? After all, people don’t spend most of their time thinking about video-editing secrets, impressionist painters, movies, or poetry. We all have lives to live.
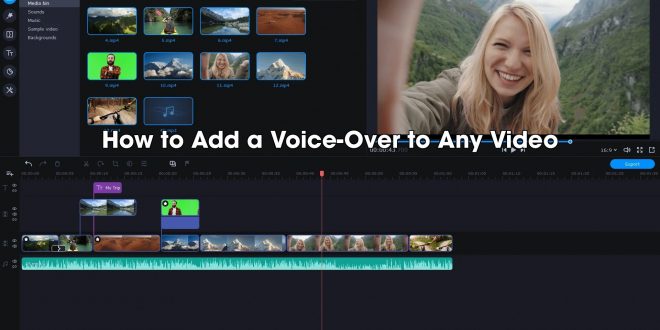
But it is always up to us to try making something worth thinking about. Say, a video with a voice-over? Read a poem accompanied by a video sequence of your choosing, or just tell about your insightful vacation adventures. Of course, your tool should help speed you up, not slow you down. Gladly, that’s where Movavi Video Editor Plus shines.
Here’s our short guide to help get you started How To Do Voice Over.
With Movavi Video Editor Plus, even if this is your first attempt, you’re going to love the result. You won’t have any problems understanding what to do and how to get what you want with our user-friendly interface.
In this article:
Step 1. Install the voice-over maker
Skip this step if you already own Movavi Video Editor Plus
Launch the installation file and follow the software instructions to complete the process.
Step 2. Open the video in the program
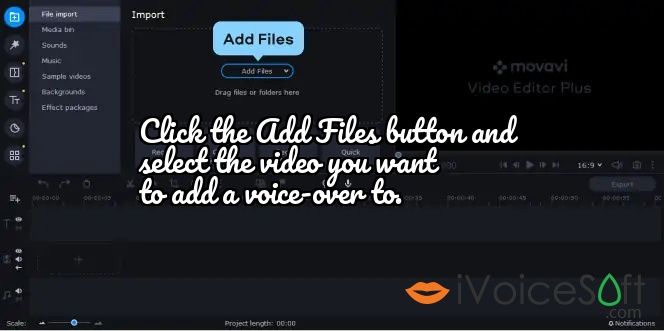
Launch Movavi Video Editor Plus, click the Add Files button and select the video you want to add a voice-over to. The selected file will appear in the Media Bin. Drag and drop your file into the Timeline at the bottom of the program window.
Step 3. Add a voice-over to the video
Click the Record Audio button above the Timeline to see the audio-recording options. Select your recording device from the Audio device list. If you want to keep track of the video while recording your voice-over, check Play video during the recording.
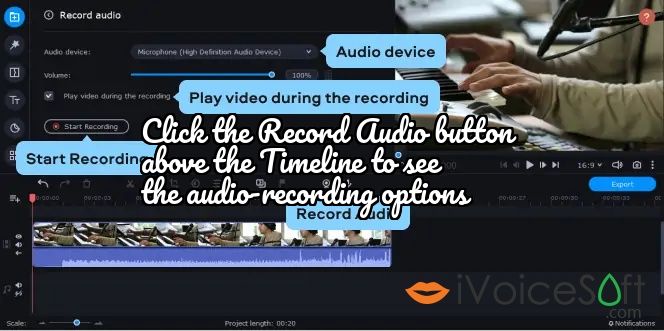
Now it’s time to add voice to the video! Place the red marker at the point on the Timeline where you want to start the voice-over and click Start Recording. Click Stop Recording to finish the sound capture.
Step 4. Edit the volume level of background sound
If the source video has a soundtrack, it will play alongside the voice-over. If the sound interferes with your commentary, you can make the existing soundtrack sound quieter so you can use it as background music or even turn it off.
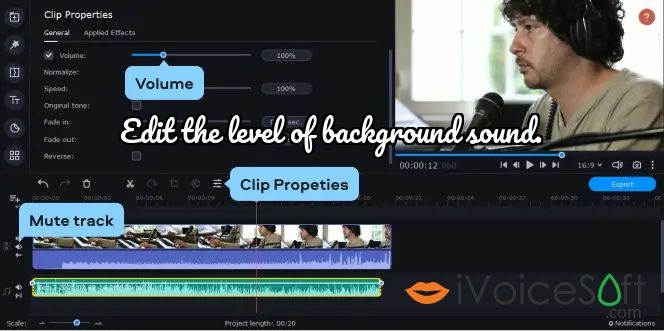
Select the source soundtrack. It should be right below the video track. Then click the Clip Properties button. Drag the Volume slider left to lower the soundtrack volume. We recommend a volume of around 20% of the original.
To disable the source audio completely, click the Mute track button to the left of the track. If you decide to turn the background sound back on, click the same icon again to unmute the video.
Step 5. Add effects to the voice-over (optional)
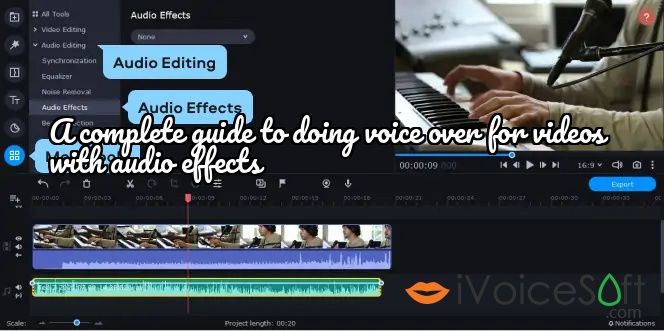
If you want to change the way your voice sounds on the recording, select the voice audio track on the Timeline. Open the More Tools section and click Audio Effects, then choose an effect from the drop-down list. You can listen to examples of some of these effects in our YouTube tutorial on how to voice-over a video linked at the top of this page.
Step 6. Save the result
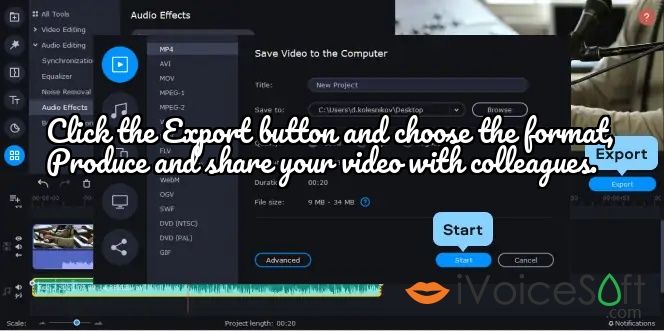
Click the Export button and choose the format in which you want to save the video. You can choose any of the available formats or a preset specifically made for your smartphone, tablet, or even TV. Now click Start to save the result to your PC or Mac.
Now you know how to make a voice-over video using Movavi Video Editor Plus. Read on to learn how to add voice to a video on mobile devices
Everything you need to create better stuff is only one click away. All the might of artificial intelligence, hundreds of templates, effects, and transitions. And of course, huge discount for you right now.

 iVoicesoft.com Media Software Review

