Online Method to Remove Scratches from Damaged Photos
Are you in possession of old photographs that have suffered damage over time? Are you looking for a way to remove photo scratches online? Whether it’s a bent corner or scratches and dust stains on the surface, you’ve come to the right place. We can guide you on how to digitally reconstruct and repair these old and damaged pictures. Let’s explore some excellent advice on revitalizing printed photographs for the digital age.
In this article:
- Part 1: Exploring Common Problems Found in Old Photographs
- Problem 1: The photo has faded in whole or in part.
- Problem 2: The photograph has a color cast
- Problem 3: The photo exhibits wrinkling, tearing, scratching, or spots on its surface
- Problem 4: The photo’s surface exhibits texture
- Problem 5: Certain parts of the photograph are missing or damaged
- Problem 6: Poor quality or bad photography
- Part 2: Three Top-notch Online Tools for Free Scratch Removal from Old Photos
- Part 3: Understanding the Hazards of Image Degradation in Photographs
- Part 4: Methods of preserving images
- Conclusion
Part 1: Exploring Common Problems Found in Old Photographs
The most effective approach to reconstructing old images depends on the prevailing issues that often arise. Here is a summary of frequent concerns you may encounter:
Problem 1: The photo has faded in whole or in part.
This problem occurs due to the gradual degradation of the photo’s emulsion caused by exposure to UV radiation, air, or fluctuating temperatures. There are a number of cases, one side of the image may remain unchanged while the other fades progressively.
Problem 2: The photograph has a color cast
In some instances, a color image may be entirely covered in a yellow, red, or washed-out hue. This occurrence could result from the emulsion’s chemical interaction with the air or paper.
Problem 3: The photo exhibits wrinkling, tearing, scratching, or spots on its surface
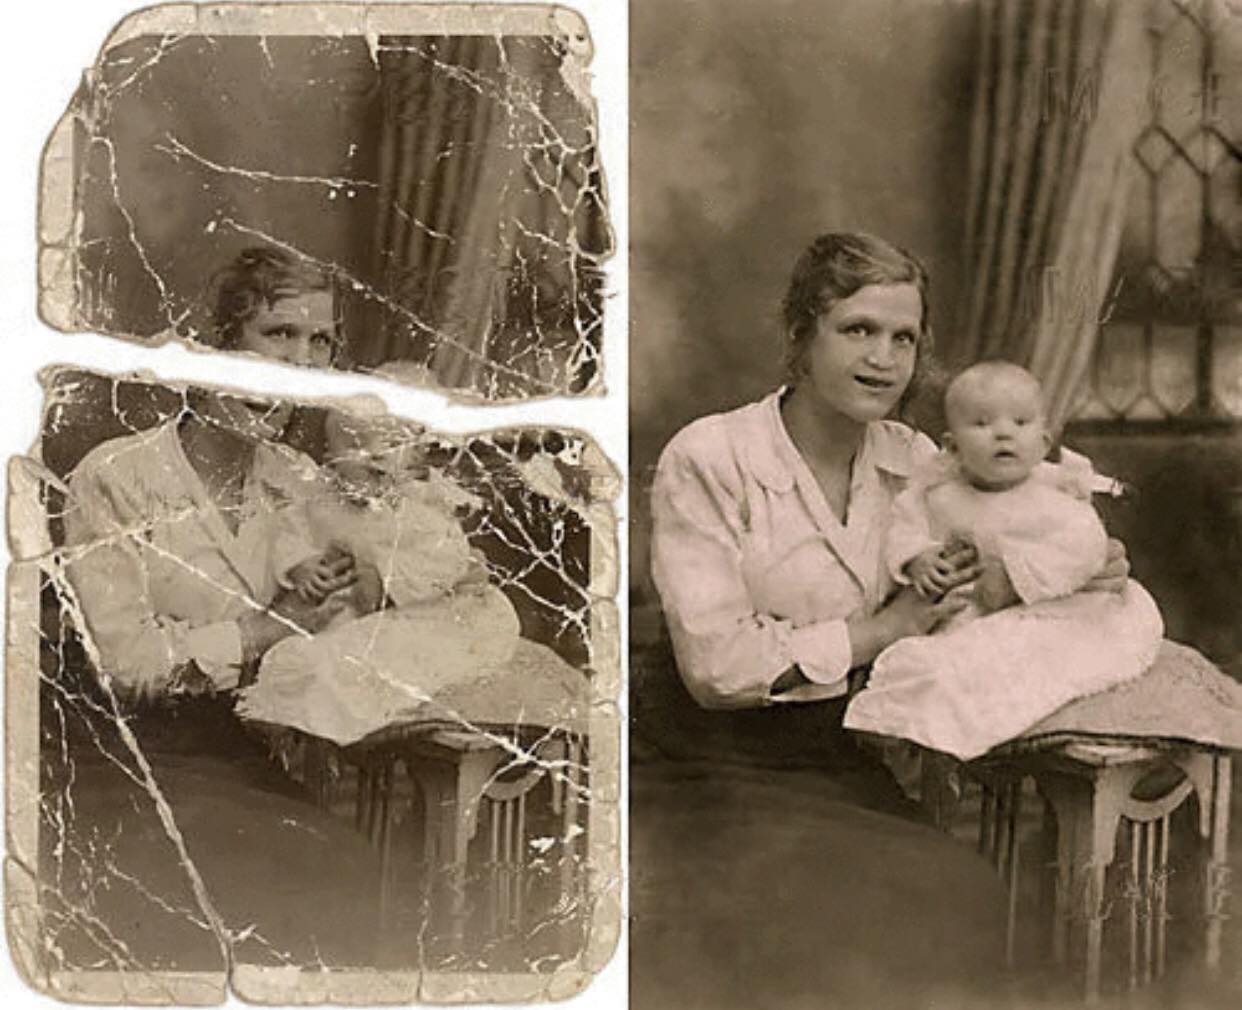
Using an online photo scratch remover may aid in addressing wrinkles and scratches. However, exposure to dust can lead to the formation of spots on the photo’s surface. Furthermore, images stored in a humid atmosphere are susceptible to mold growth, which can manifest as large or little splotches on the image.
Problem 4: The photo’s surface exhibits texture

Several old pictures were reproduced on textured paper, resulting in a textured surface. However, during the retouching process, removing this textured surface can present challenges.
Problem 5: Certain parts of the photograph are missing or damaged
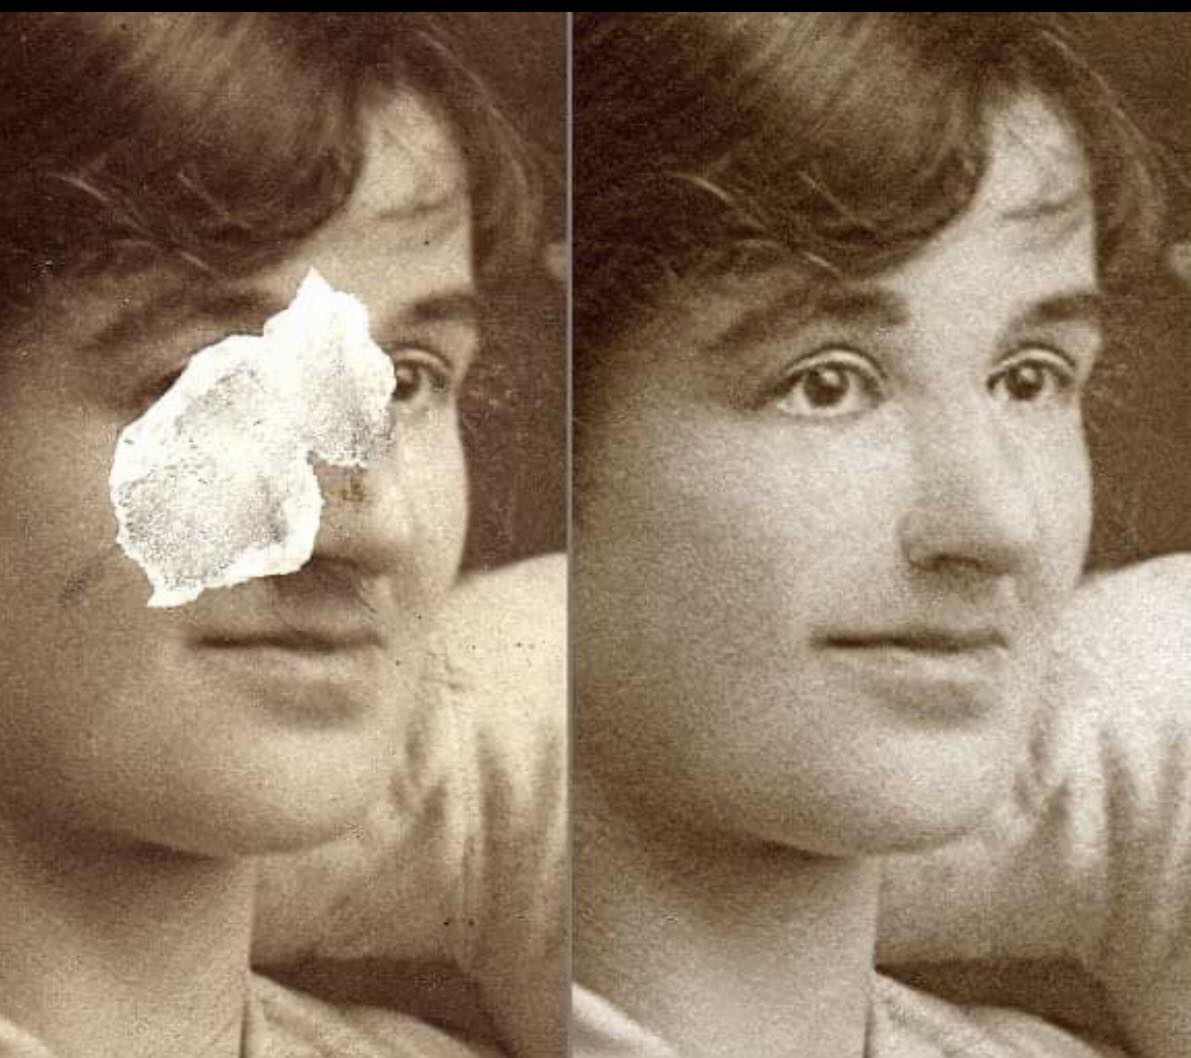
An integral part of the image, such as a hand or a face, could be significantly scratched or entirely missing. Moreover, a corner of the image might be absent, or it may have peeled or faded away over time.
Problem 6: Poor quality or bad photography
The picture might include extraneous elements like phone lines or out-of-focus areas. Additionally, the photograph could have been taken at an unfavorable moment, leading to uneven composition or underexposure/overexposure issues.
Part 2: Three Top-notch Online Tools for Free Scratch Removal from Old Photos
Using professional services to restore an antique photograph can be time-consuming and expensive, which is not always viable. However, you have other suitable alternatives. One such alternative is the application given below, which allows you to simply and economically restore your old photographs.
Wondershare Repairit – AI Old Photo Restoration is a powerful tool for properly repairing old pictures. As the most effective and user-friendly tool, it utilizes mature AI technology to remove scratches, spots, and smudges from old photos. It also enhances facial clarity in the images and offers the capability to colorize old photos using AI. The most incredible aspect is the fact that you can utilize this tool absolutely free of charge!
📢 Right now, Wondershare Repairit is offering a significant discount. Use this code at checkout to enjoy big discount for Wondershare Repairit.💰
🚀 Don’t pass up this fantastic offer! Seize it before it’s too late!
Wondershare Repairit makes it easy to restore old pictures in few simple steps.
Wondershare Repairit -Achieve flawless restoration of old and scratched photos with cutting-edge AI technology.
- Effortlessly remove scratches, enrich colors, and enhance the sharpness of faded parts in vintage photographs.
- Experience the wonders of mature AI technology as it revitalizes and colorizes your treasured old photos.
- Photographs can be restored in a variety of formats, such JPG, JPEG, WEBP, PNG, BMP, & GIF, and are compatible with every picture types.
- Rest assured with the highest level of security technology while entrusting your precious memories for restoration.
Here’s a quick guide to help you get started:
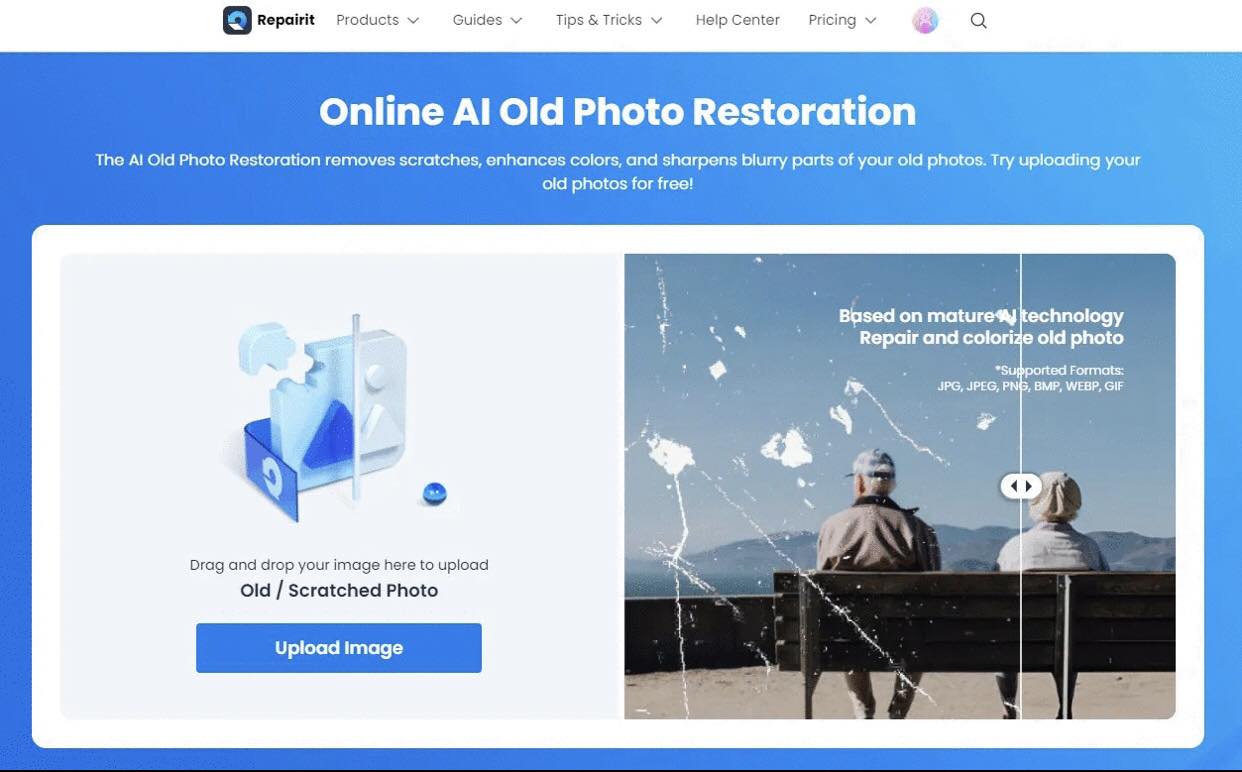
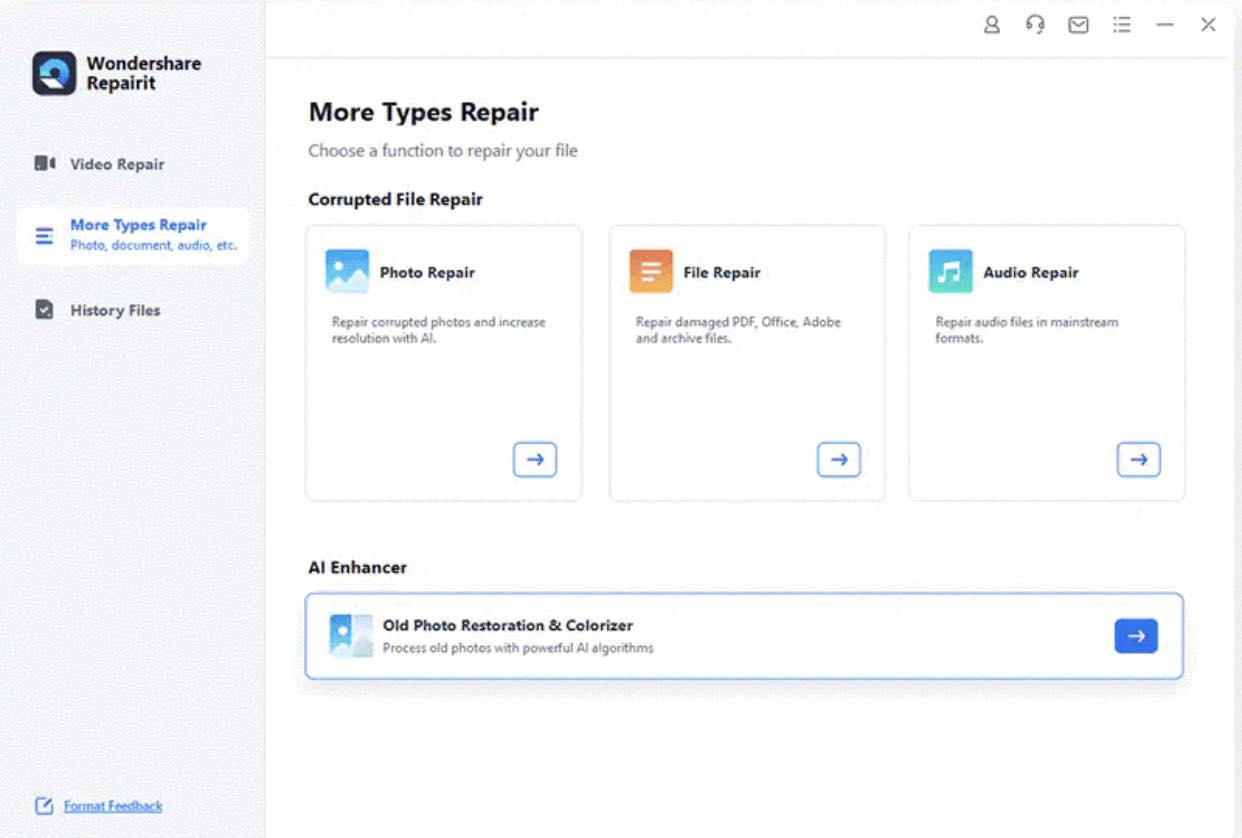
Step 1: Access Wondershare Repairit for Old Photo Restoration.
Begin by opening the Wondershare Repairit tool for old photo restoration. You can access it online or use the version installed on your device. The user interface will appear on your screen, as shown below.
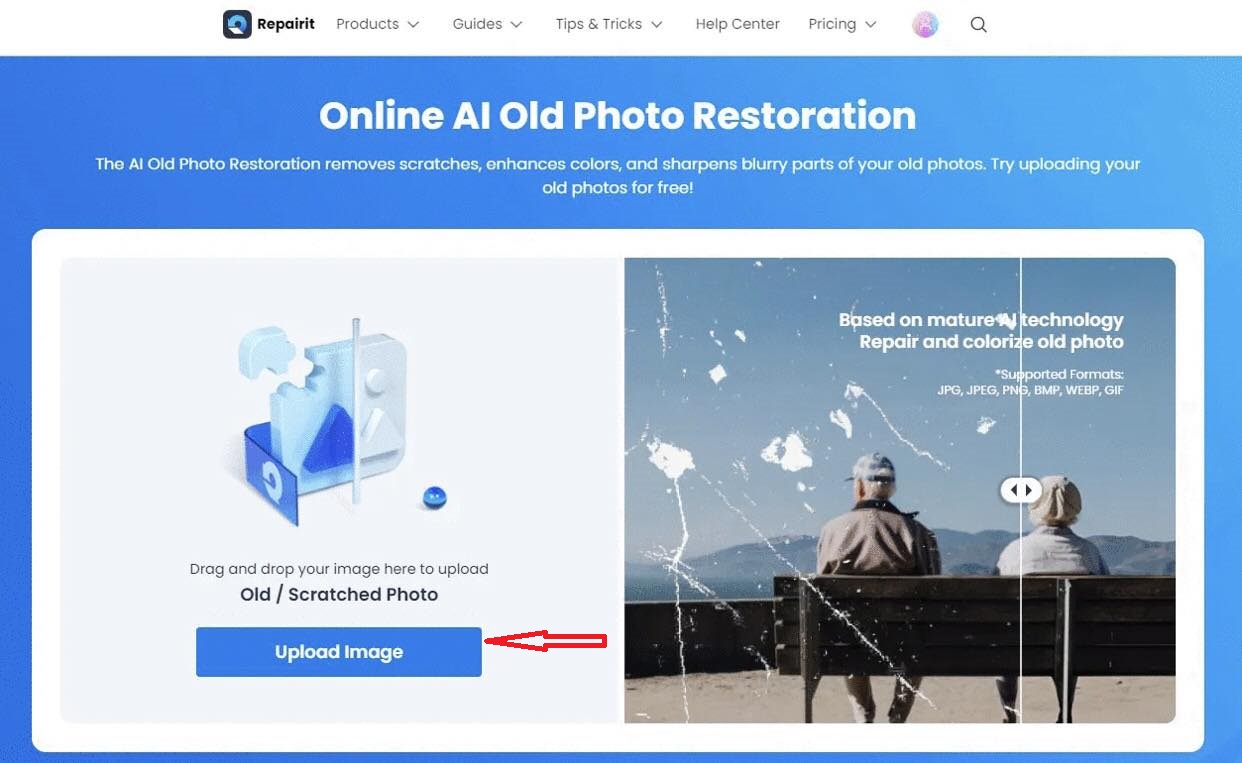
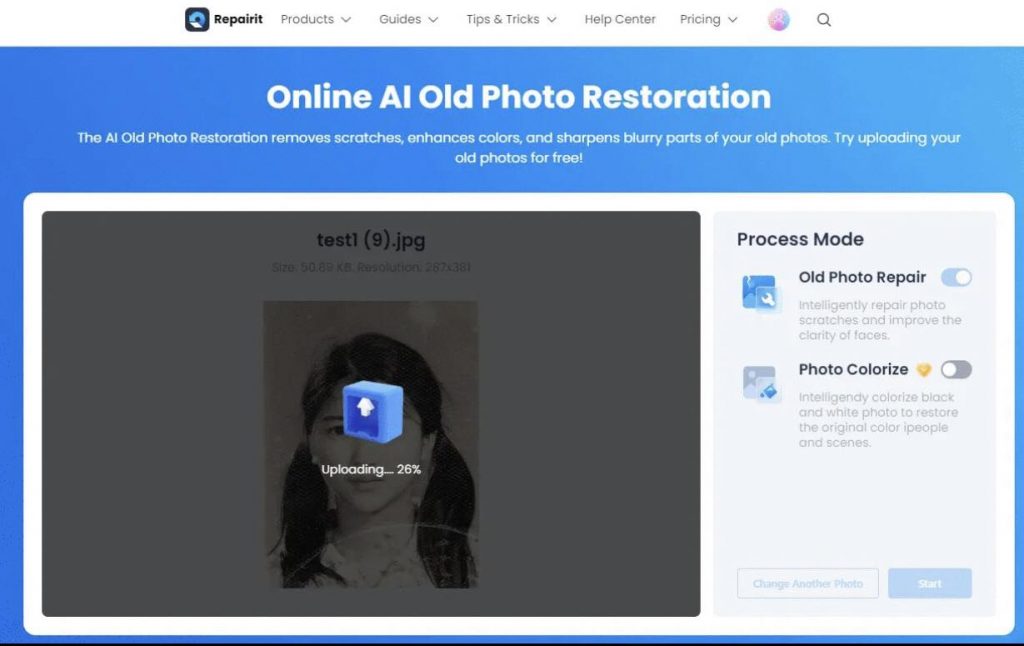
Step 2: Upload the Old Photo.
Click on the “Upload Image” button in blue, which will enable you to upload the old photograph that requires restoration.
Step 3: Initiate the Restoration Process.
Once you’ve uploaded the photograph, you’ll be presented with two options:
“Old Photo Repair” and “Photo Colorize.” Choose the “Old Photo Repair” mode. If it displays disabled on your screen, it must be enabled.
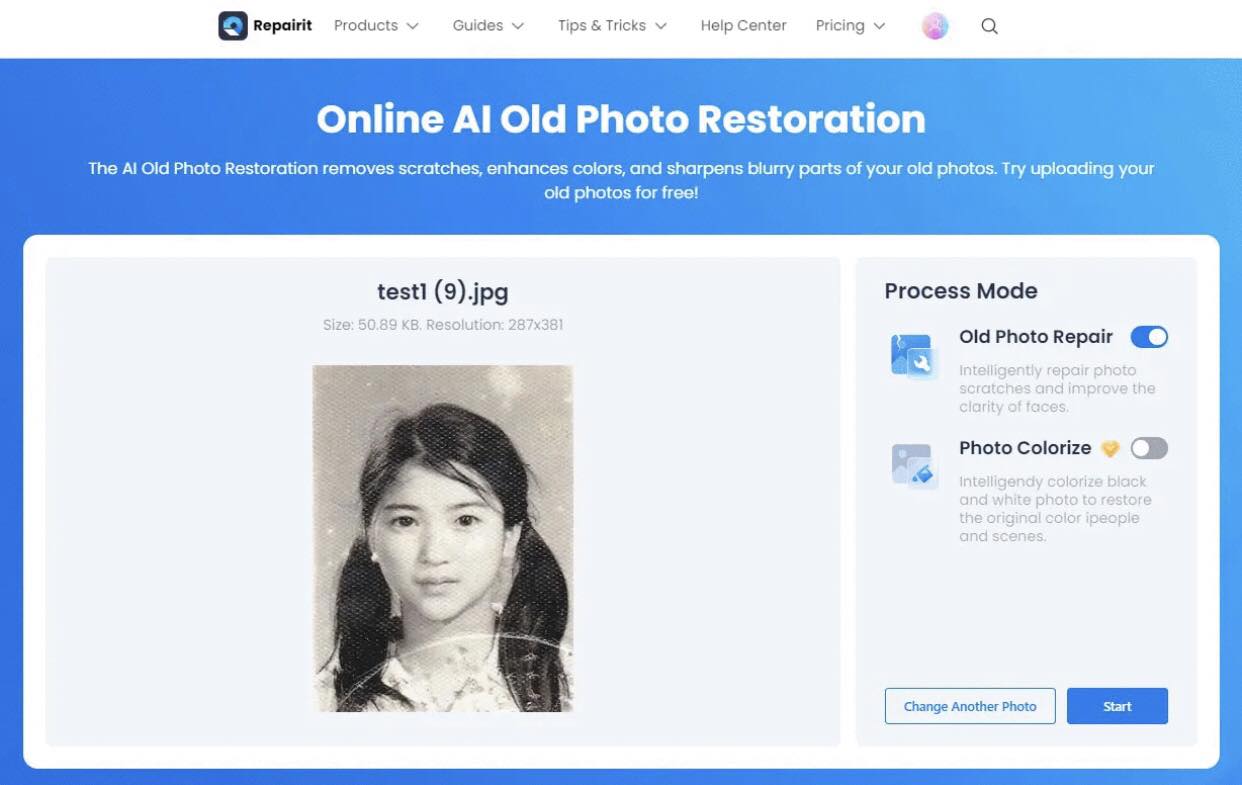
Then, in the bottom right-hand corner, click the “Start” button, which is normally highlighted in blue. This will begin the restoration process, which should just take a few seconds.
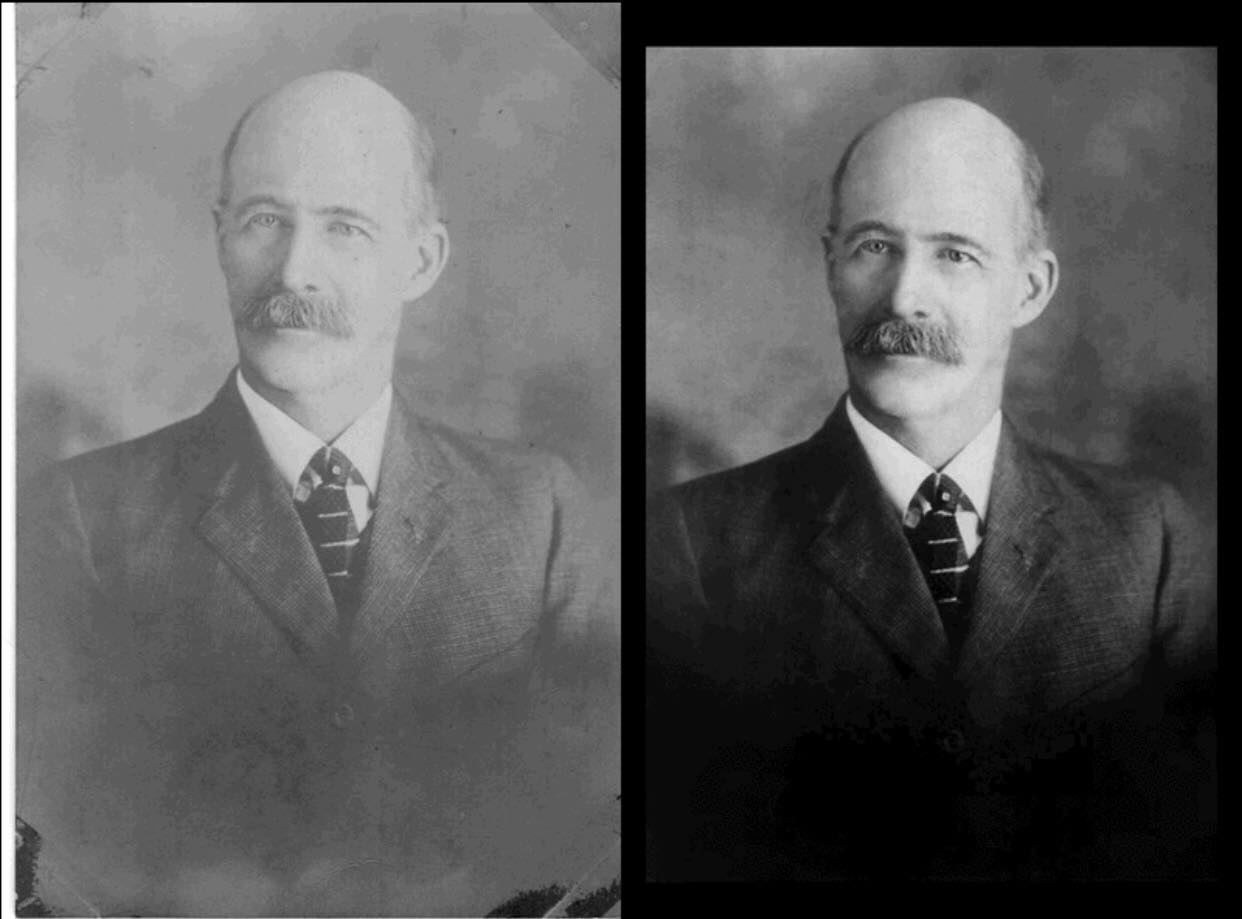
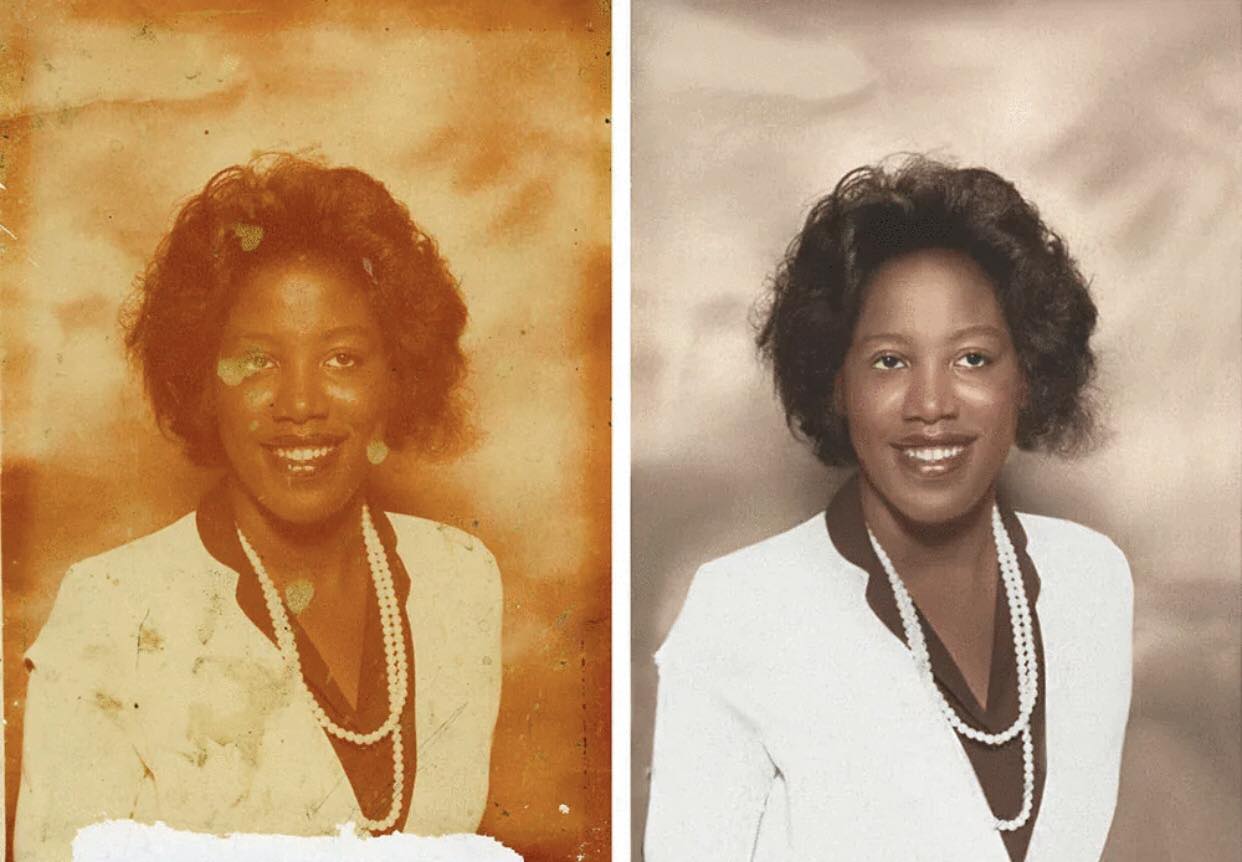
Upon completion, you will receive a message indicating “Processed Successfully.” You can now preview the restored photograph by swiping left and right to observe the improvements. When you’re happy with the outcome, save the corrected photo to your device in a location of your choosing.
Tool 2: PhotoGlory
Colorize your black-and-white images in seconds with PhotoGlory’s different automated tools or smart brushes designed for human manipulation. This software contains a number of tools for removing wrinkles, scratches, stains, scribbles, and damaged edges. Color saturation can be improved, blemished images can be repaired, and custom text labels and date stamps can be applied.
Follow these methods to restore old photographs with PhotoGlory:
Step 1: Download and install PhotoGlory
Start by downloading the PhotoGlory software and installing it on your computer. Follow the setup wizard’s instructions to complete the installation process.
Step 2: Open and Crop the Photo
Launch the PhotoGlory program and open the old photo you want to restore. If the edges of the photo are damaged, you can use the crop function to remove torn or undesirable corners.
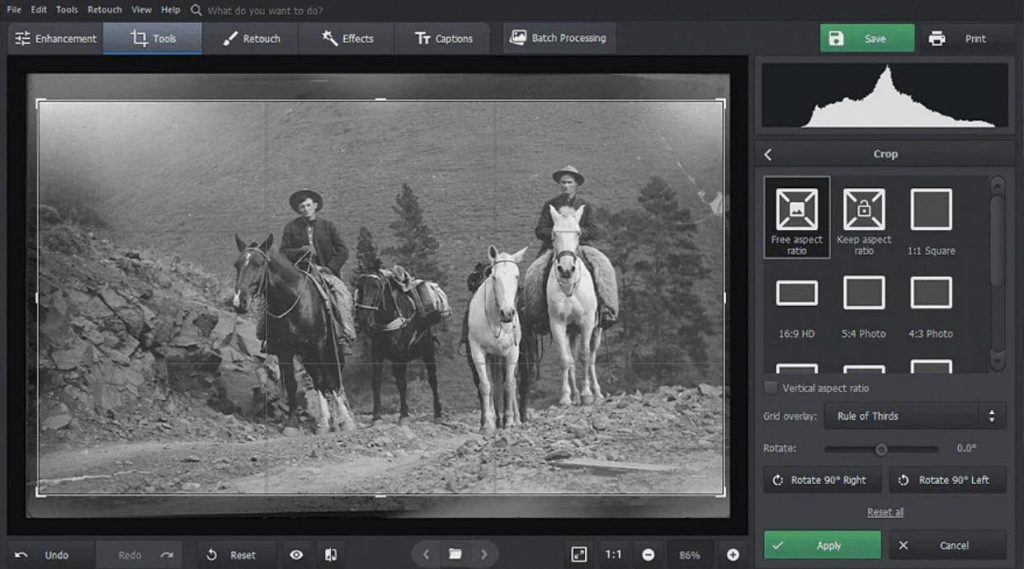
Head over to the Tools menu and choose the crop function. Use the markers to adjust the frame so that the torn corners are excluded from the final cropped image.
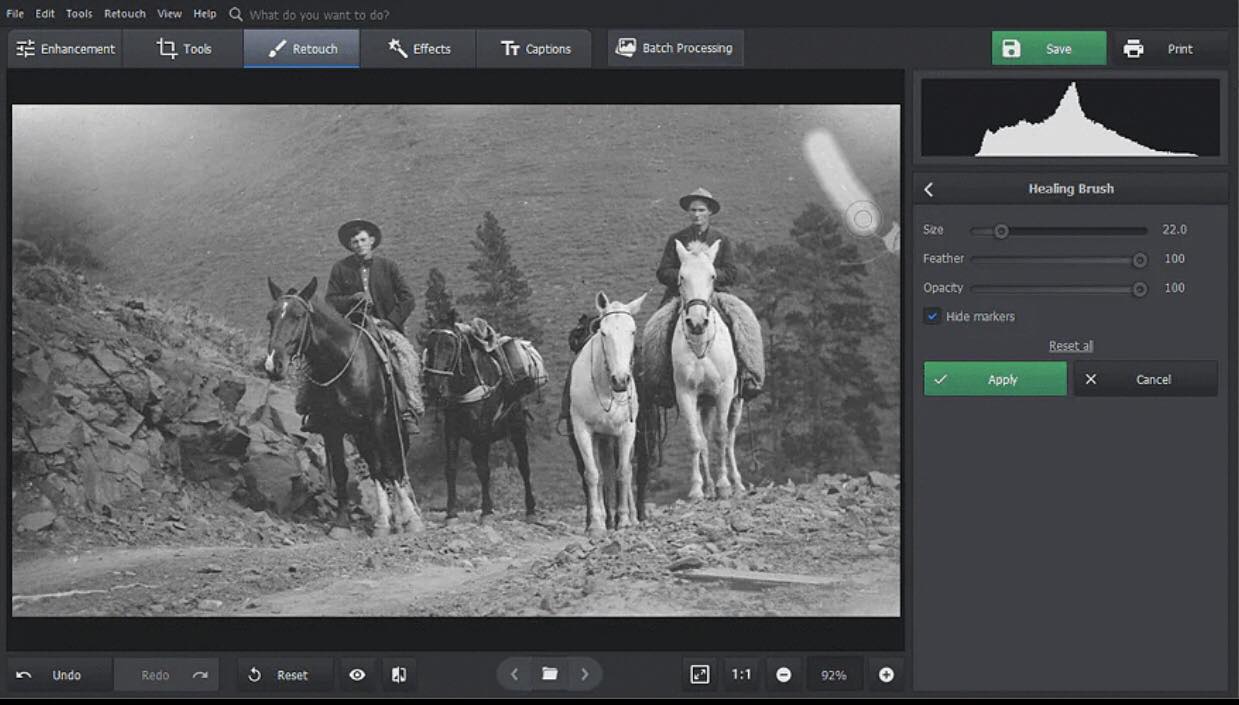
Step 3: Erase Flaws and Imperfections
Navigate to the Retouch tab to find a number of tools for removing flaws created by the passage of time. To conceal significant flaws like rips or missing portions, employ the patch tool. For medium-sized faults such as stains, lumps, and small rips, use the Clone Stamp tool. Finally, for minor imperfections like wrinkles or dust, make use of the Healing Brush tool.
Step 4: Restore Colors
If the original photo has faded colors, you can restore them using PhotoGlory’s color restoration feature. This will bring back vibrancy to your images. Additionally, if your photo is black and white, you can use PhotoGlory’s colorization option to automatically add colors and manually tweak them as needed.

Tool 3: SoftOrbits Photo Retoucher
SoftOrbits Photo Retoucher is a powerful tool for repairing fading old images. Its user-friendly design and robust capabilities make it a great solution for addressing a wide range of photo restoration concerns. You can simply breathe fresh life into outdated photographs with this program, ensuring they are clean, perfect, and free of faults.
To restore old photos using SoftOrbits Photo Retoucher, follow these steps:
Step 1: Scan the original photo
Start by creating a digital copy of the old photo that requires restoration. After scanning or photographing the original image, you are ready to begin the repair procedure.
Step 2: Load the image into the software
Launch the SoftOrbits Photo Retoucher and locate the “Add a File” option. Use this feature to upload the scanned image into the software for editing.
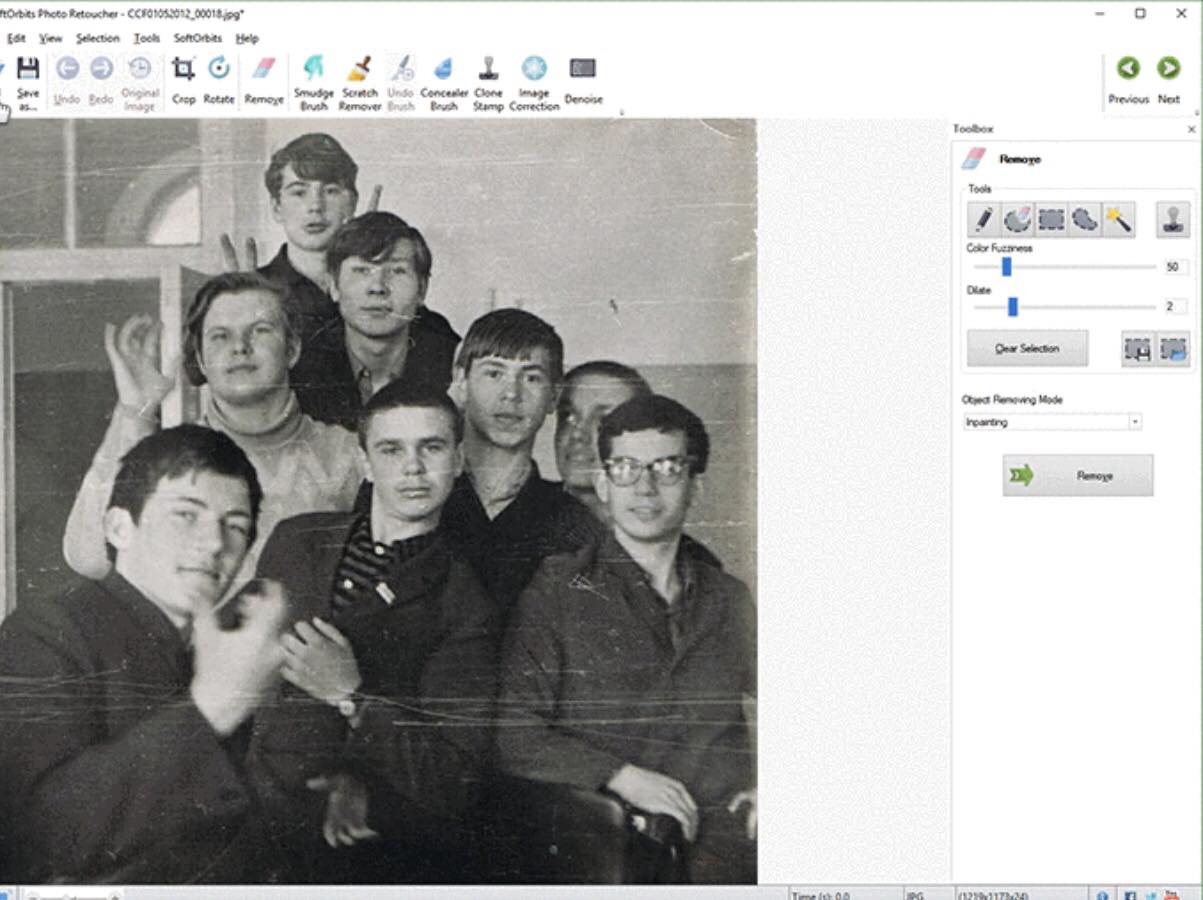
Step 3: Select the remove tool
In the software’s toolbar, you will find a “Remove” icon. Click on this option to enable the tool, which allows you to easily label and remove damaged or scratched areas.

Step 4: Repair and highlight damaged image areas
Access the right-side panel and select the pencil icon. Adjust the size of the pencil to match the damaged area’s size.
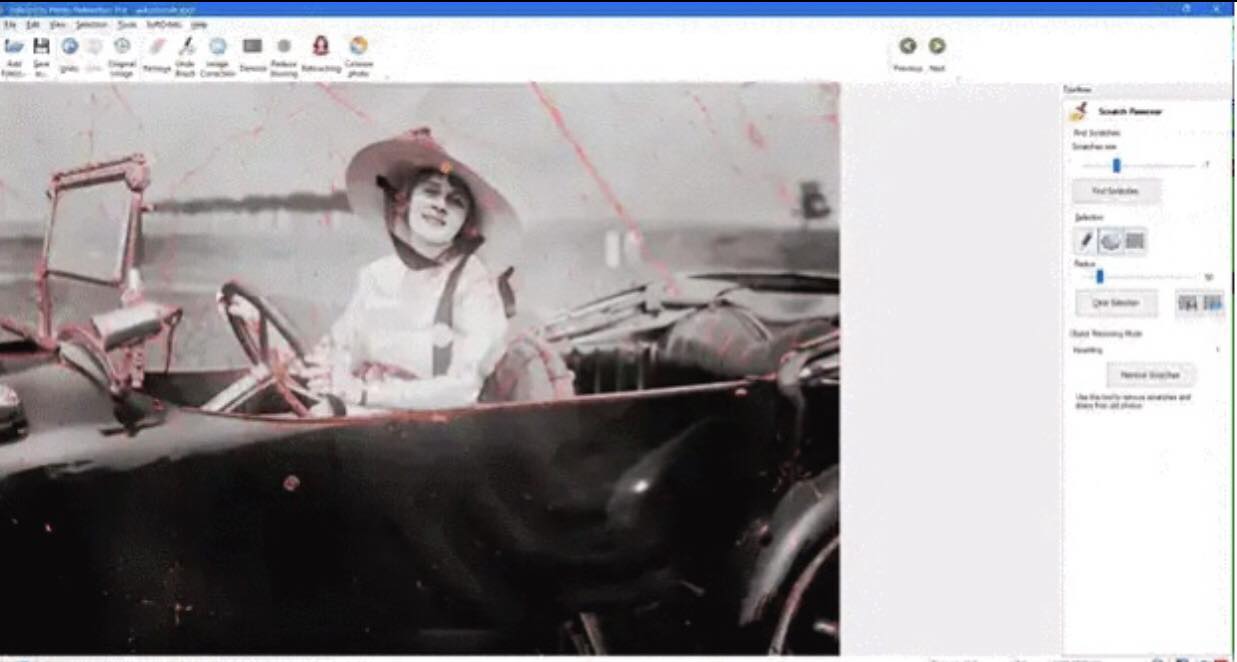
Use the mouse to left-click and highlight the damaged regions in red. This step helps in marking the areas that need to be fixed.
Step 5: Remove the chosen region
Once you have highlighted the damaged areas, click on the “Remove” button located in the bottom right corner of the software.
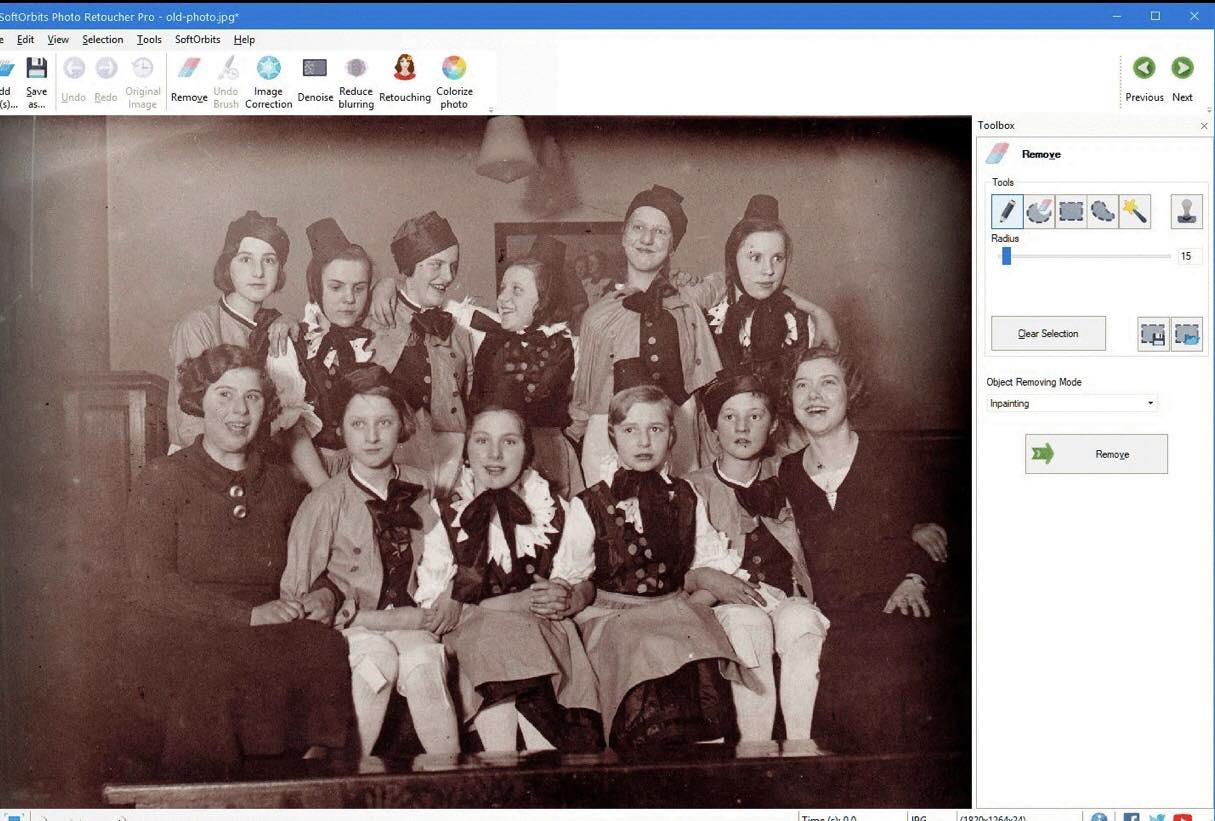
SoftOrbits Photo Retoucher will automatically analyze the pixels and seamlessly clean up the marked areas, leaving the photo clean and blemish-free.
🔥 URGENT DEAL ALERT! Transform your photos with SoftOrbits Photo Retoucher! Get exclusive discount code and say goodbye to imperfections. Limited time offer, act fast! ⏳
Part 3: Understanding the Hazards of Image Degradation in Photographs
Photographs deteriorate due to various factors, leading to the gradual degradation of images over time. Neglecting proper care can result in photos fading away and becoming nothing more than dusty, smeared remnants, eventually ending up discarded. Understanding the causes of image fading enables you to protect your cherished memories from destruction and ensure their preservation for generations to come.
Commonly attributed factors responsible for photograph fading include:
- Exposure to UV Light: Prolonged exposure to direct sunlight can rapidly deteriorate a photograph, causing the colors to fade and the image to develop splotches due to the breakdown of plastic molecules influenced by UV radiation.
- Airborne Pollutants: Apart from sunlight, various airborne pollutants, such as dust, cleansers, smoke (from cigarettes, fires, or cooking), can accelerate the aging process of photographs, leading to fading and disintegration if left unprotected.
- Acid Damage: Household items with high acid concentrations can adversely affect photographs, altering their chemical composition and causing deterioration. Using acid-free materials is crucial for preserving the longevity of images.
- Adhesives: Improper use of adhesives, like tape or sticky substances, can result in a sticky texture on photos and cause discoloration as the chemical properties of the colors are affected, leading to yellowing and stains.
- Paper Quality: Choosing the wrong type of paper or not using acid-free materials when printing or storing photographs can contribute to their rapid aging and deterioration.
- Scrapbooks and Albums: Some scrapbooks and photo albums, especially older ones, may contain materials that promote yellowing, brownish, or orange discoloration in photographs. It’s essential to use acid-free albums to safeguard the quality of the images.
Part 4: Methods of preserving images
- Optimal Storage Conditions: Ensure your photographs are stored in an environment with a constant temperature of roughly approximately 65°F-70°F (18°C-21°C) and a relative humidity of about 50%. If your home cannot provide these conditions, consider using a safe deposit box at a bank for better preservation.
- Separate Negatives from Photos: Store negatives separately from the photographs to have a backup in case the original images or albums get damaged.
- Use High-Quality Storage Materials: Avoid using low-quality drugstore photo albums, magnetic albums, and paper or plastic storage products. Instead, opt for lignin-free, acid-free, and unbuffered paper for photo storage. Choose PVC-free polymers like Polyester, Mylar, Polypropylene, Polyethylene, or Tyvek for safekeeping.
- Protect from Heat and Moisture: Keep photographs away from heat sources like heaters and dryers. Store them on high shelves, away from water pipes, and in areas that are not susceptible to water damage from floods or leaks.
Conclusion
With the aid of digital technologies, there is hope for restoring fading, torn, or discolored images to some extent. In cases where your old photographs are severely damaged, seeking the expertise of a professional may be necessary.
While photo restoration may seem daunting with its technical intricacies, once you delve into the process, it becomes surprisingly manageable. So, take the opportunity to unearth those old, torn pictures and give restoration a try. This article has covered various methods for restoring and fixing your cherished but damaged photographs. We sincerely hope that one of these solutions proves successful for you. Preserving the visual memories of the past can be truly rewarding and worth the effort. 🌻
🚀 Get your promo code today to save big on SoftOrbits Photo Retoucher and Wondershare Repairit.
Limited time offer, buy quickly and don’t miss out on this promotion.