As we were saying in a previous review article, 123FormBuilder is a form building and data collection tool that allows you to create forms, surveys, and workflows.
The tool comes with a very large variety of features you can use to your advantage, among which we mention:
- Ease of use (it’s a drag and drop tool, so pretty much anyone can use it)
- You can build custom forms or choose from more than 1,900 templates (which you can also personalize)
- High level of customization on each form
- Third-party tool integration (Content Management Systems, Customer Relationship Management software, and so on)
- Payment processor integration (such as PayPal, for example)
- You can include notifications in your form setup
These are the 123FormBuilder features, in short. For more information, kindly visit our review of the product.

The main benefit of all these features is that you can use the 123FormBuilder platform in a myriad of ways. You can adjust the forms to pretty much every industry, you can collect payments, you can set up notifications that will allow you to stay in touch with those who fill in your forms, you can set up workflows for internal processes, and you can collect data via customers or employees using complex surveys. And these are just a few examples of how you can use 123FormBuilder.
To show you an example, we will imagine a balery that has just started to receive online orders. They do not want to make this very complicated, nor do they want to set up a whole new website to focus on eCommerce, so the easiest solution for them is to simply set up an order form.
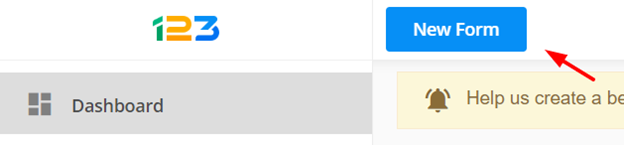
To do this in 123FormBuilder, they would first have to log in and click on “New Form” (as you can see in the image below):
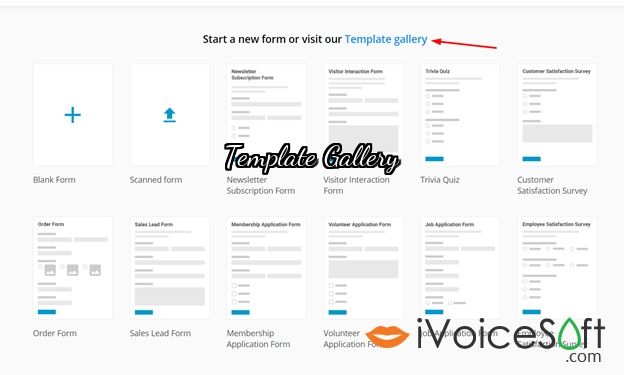
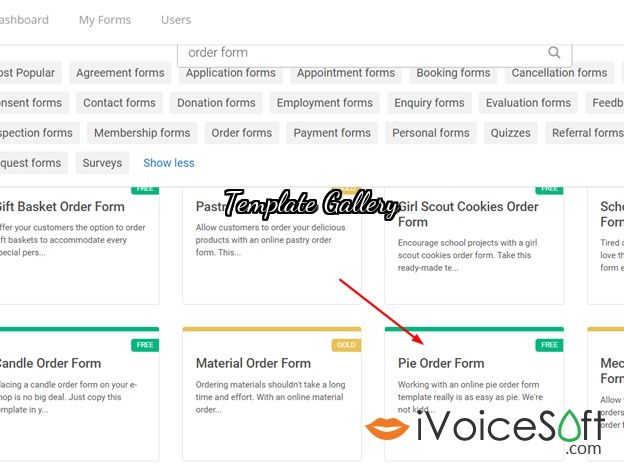
They would want to make this as easy as possible, so they will simply pull a template from the 1,900-template gallery 123FormBuilder has put together for its users. To do that, they would have to click on “Template Gallery”, as shown in the screenshot below.
By searching for “order form”, the database will show a bunch of results. Some of them are more or less suitable for our bakery, but the “Pie Order Form” would pop as a good candidate. To use this, our bakery’s representatives would have to hover over “Pie Order Form”, then click on the “Use Template”.
The form they see is mostly suitable for what they need, but they want to make a couple of adjustments to ensure that this form really suits their needs:
- They will change the list of products since they don’t sell the exact same products
- They will include a payment processor as well since they want to offer customers the option to pay online (instead of paying upon delivery)
In this article:
Editing the List of Products
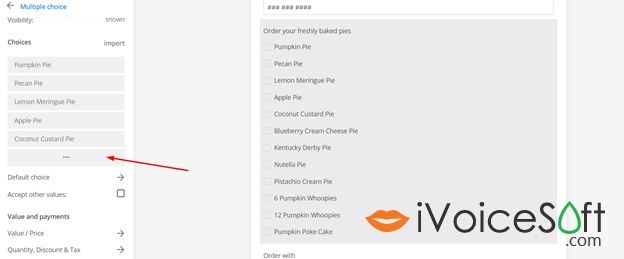
To change the products, they would have to click on the multiple-choice field containing the list of products, then on the three dots as shown in the screenshot below:
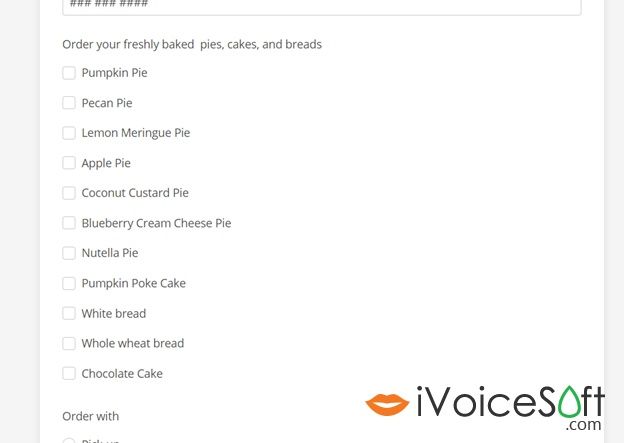
To edit the list, they would just have to click on the item they want to change. If they wanted to delete an item, hovering over the item and clicking on the “X” that appears on the right-hand side of the list would be enough.
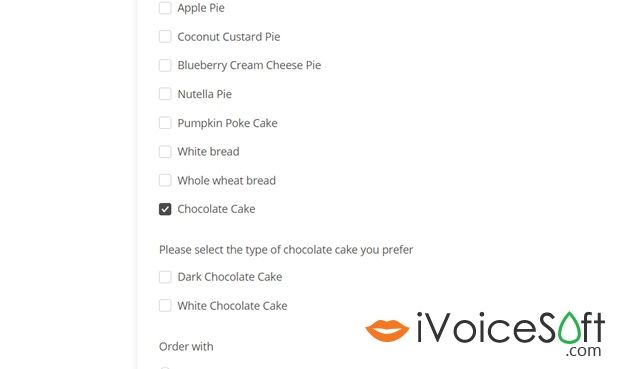
This is how their list of items would look like after the edits, for example:
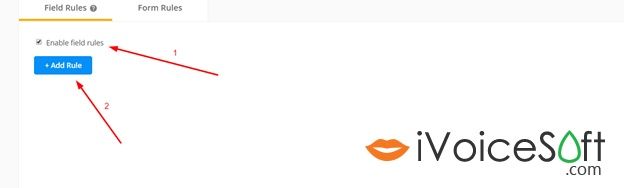
Adding Rules to a Field
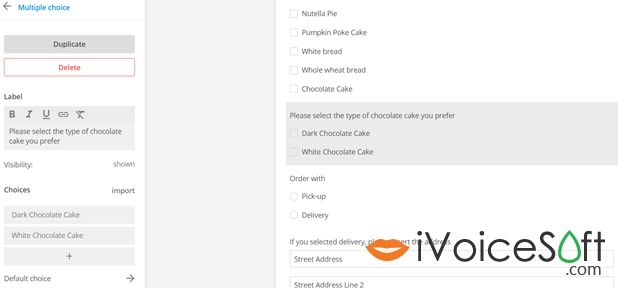
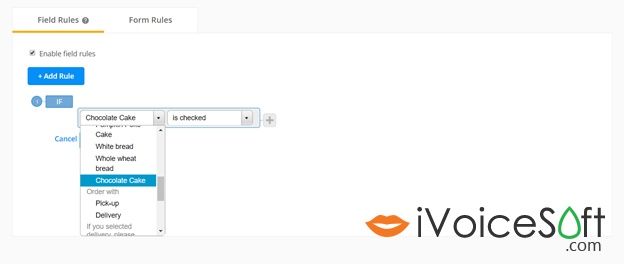
The bakery also offers two types of chocolate cake, and as such, they would want to insert a rule to trigger a further series of options when someone clicks on “Chocolate Cake”. To do this, they would first have to add a new multiple-choice field and edit it. See an example in the screenshot below:

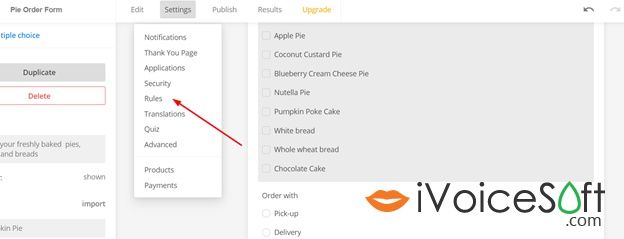
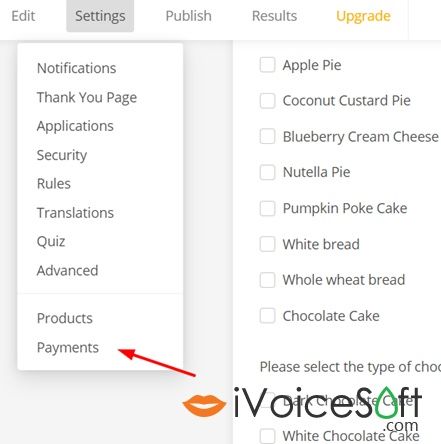
Once this is done, they would have to set up a rule. To do this, they would have to go to “Settings”, then click on “Rules” and set up a Field Rule as shown below:
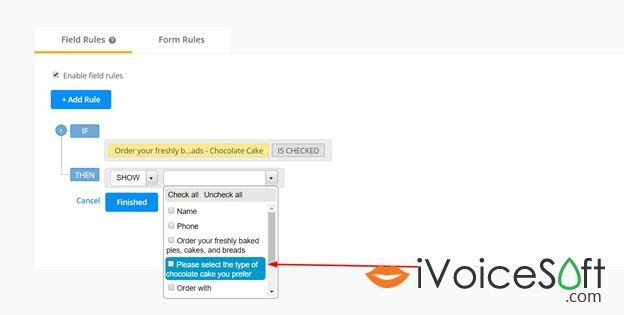
This is how the form would look like in the end:
Adding a Payment Processor to a Form
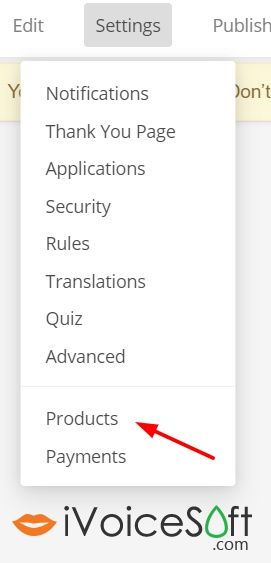
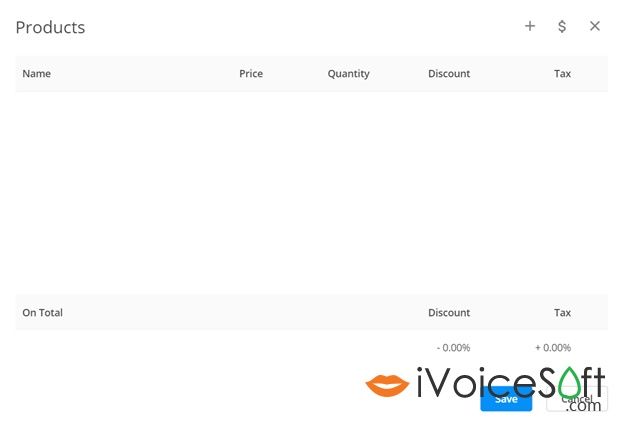
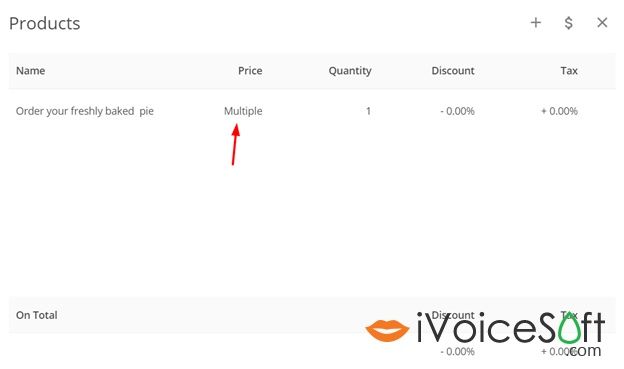
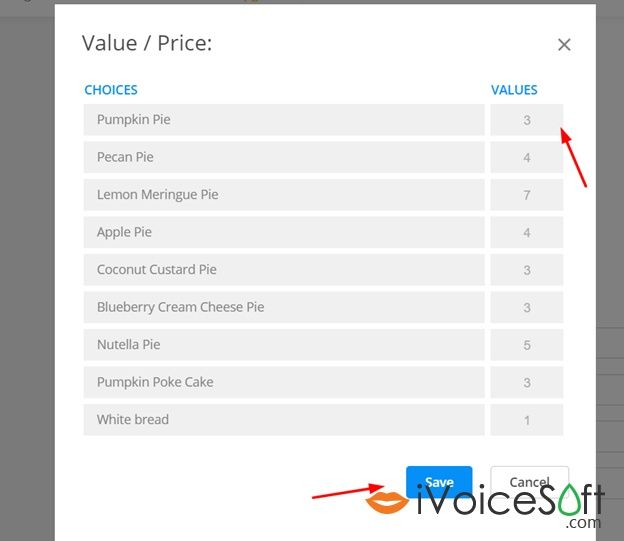
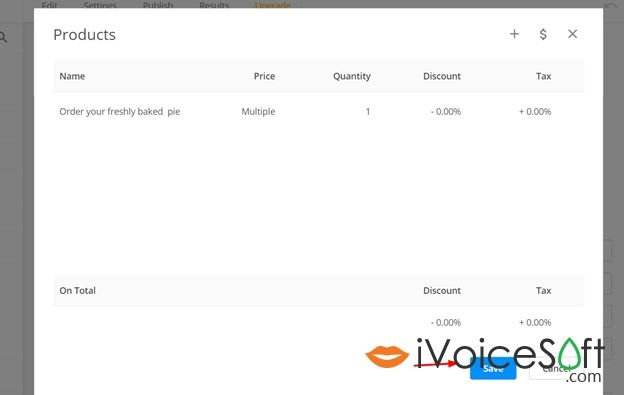
Before adding the payment processor, the bakery would have to add their products to an official list of products. To do this, they would have to go to “Settings”, then click on “Products”. A pop-up would appear on the screen, as in the example below:
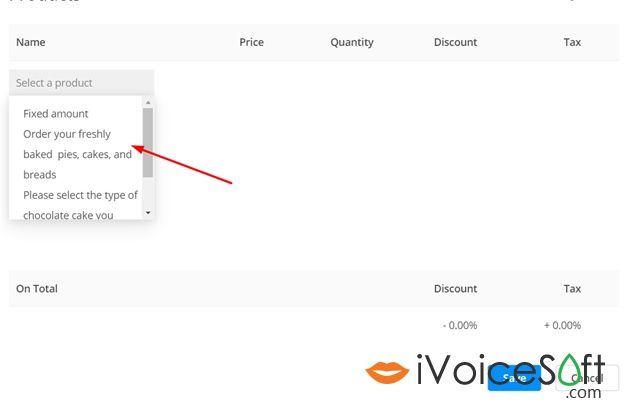
To add the products, the bakery would need to click on the “+” sign in the top right hand of the pop-up, and then add the products (in this case, the entire multiple-choice field). Every item on the list would need a price, which can be added as shown in the image below:
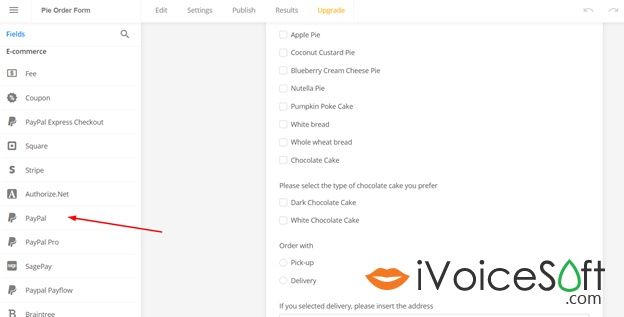
To add the payment processor of their choice, the bakery would have to go to “Settings”, then click on “Payments”, then to their preferred payment processor (in this example, PayPal).
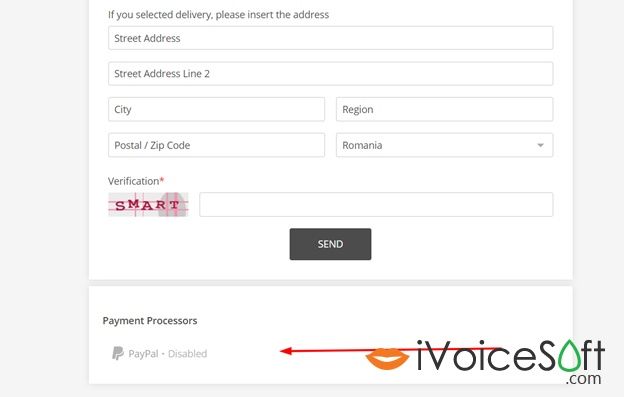
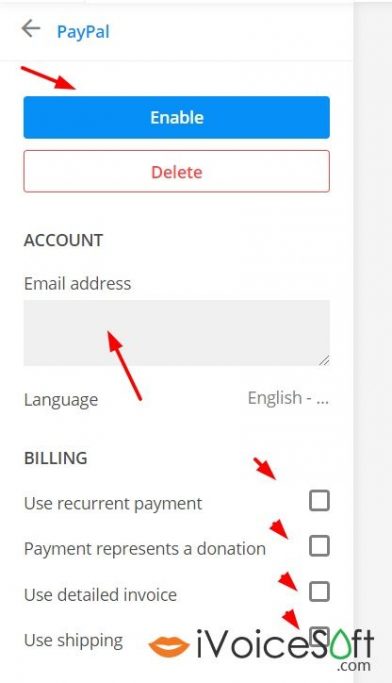
Once the payment processor has been added, the bakery would have to scroll down to the bottom of the form and see that their payment is not yet enabled. Clicking on that field would lead them to a new menu, as shown in the images below. From there, they would be able to enable the PayPal payment, as well as make any payment settings necessary (such as the PayPal email address, whether or not shipping should be added on the invoice, and so on).
That’s it! The bakery would not be able to receive online orders (and online payments), so that they can deliver their products to their customers.
This was just one example of how 123FormBuilder can be used – there is an endless number of options users can play with so that they create forms that truly suit their needs in every respect. For more information on how to use 123FormBuilder, do not hesitate to check their Knowledge Base.
123formbuilder coupon codes, The awe-inspiring offering sales of 123formbuilder.