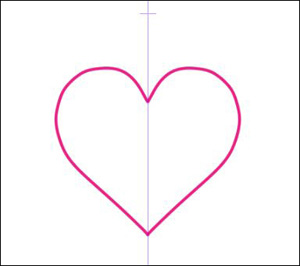
Creating symmetrical drawings in Clip Studio Paint involves the use of a Symmetry ruler.
Here’s a step-by-step guide on how to draw with symmetry:
In this article:
Procedure: Drawing with Symmetry
1. Begin by selecting the layer on which you want to draw symmetrically.
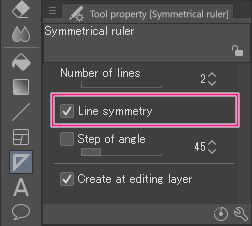
2. Next, choose the Ruler tool, and then select the Symmetrical sub tool.

3. Within the Tool property palette, activate the Line symmetry option.
4. To establish a Symmetrical ruler on your canvas, simply drag from the point where you want the centerline to be.
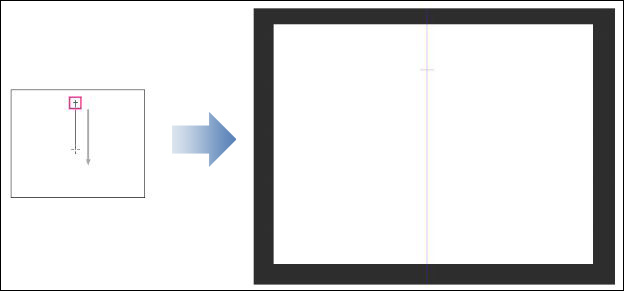
This ruler will serve as your symmetry guide, allowing you to draw symmetrically around it.
Keep in mind that the Eraser tool doesn’t inherently have symmetry enabled, but you can configure it to be symmetrical.
A Step-by-Step Tutorial for Making a Vertical Ruler
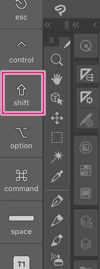
- Use Shift to draw a line: To draw a vertical line, simply hold down the Shift key and drag your stylus or cursor. On tablet or smartphone versions, use the Shift key on the edge keyboard.
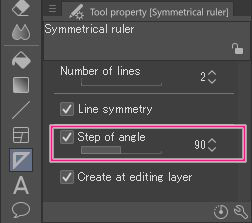
Draw a line using Step of angle: Another method to create a vertical line is by enabling the Step of angle option in the Tool property palette and setting the value to 90 degrees.
Switching Symmetrical On/Off
You can toggle symmetrical drawing on and off by following these steps:
- Go to the View menu and select “Snap to Special Ruler.”
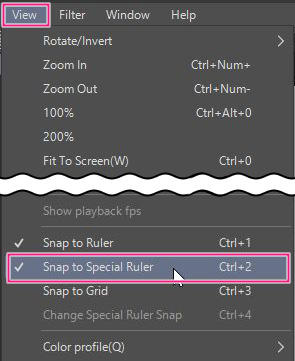
Please note: You can also turn symmetrical drawing on and off by clicking the Snap to Special Ruler icon located on the command bar.

These instructions should help you effectively utilize symmetry in your drawings within Clip Studio Paint.
💥 Time to Create Masterpieces! Get Clip Studio Paint at 60% OFF TODAY! Unleash your inner artist and SAVE BIG!
Don’t wait, this deal won’t last long.
Buy now for 20% off!