In this tutorial, we will instruct you 4 important steps to create an eye-catching 3D slideshow that can be used for various purposes, from entertainment to business. In order to do this, we need the great help of SmartSHOW 3D– one of the smartest slideshow makers for PC.
If you haven’t got this tool yet, please buy it with 70% discount now (only $8)
In this article:
Step 1: Apply 3D transitions
Once you add the photos to SmartSHOW, the program automatically applies random 3D transitions between them. These can vary so if you want to change it, do the following steps:
- Click on each transition to preview it (1). These are originally set for 2 seconds.
- Go to Transition tab (2) >> 3D transitions (3) >> drag and drop your new choice to the old transitions (4).
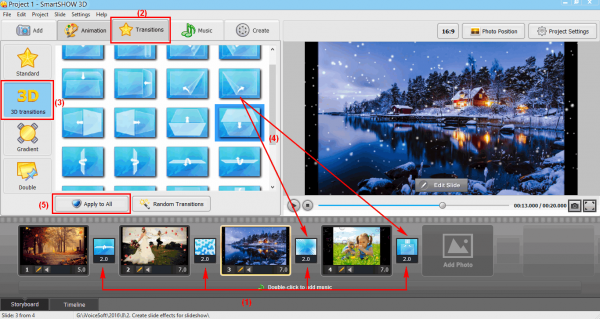
- If you want to use one transition for the whole slide, click Apply to All (5).
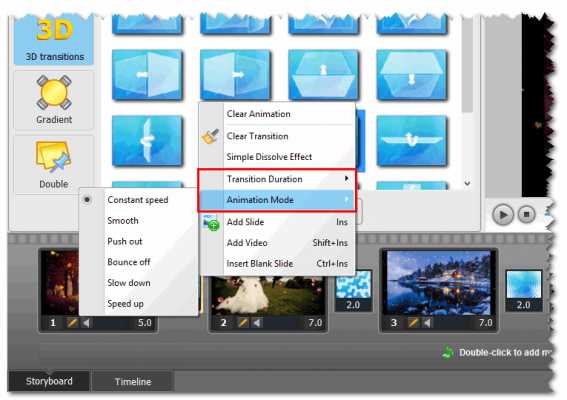
- Right-click on each transition to change the duration time and transition mode.
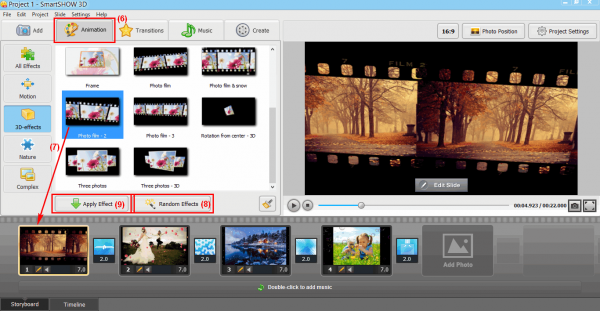
Step 2: Apply 3D special effects
Go to Animation tab (6), SmartSHOW offers you different types of effects that that polish your photos in just one click. Select your favorite, then drag and drop it to the photo(s) you want to have this effect (7).
Tips:
- Click Random Effects if you want SmartSHOW chooses effects for you (8).
- To apply one effect for multiple photos, press Ctrl and select them >> Click Apply Effects (9).
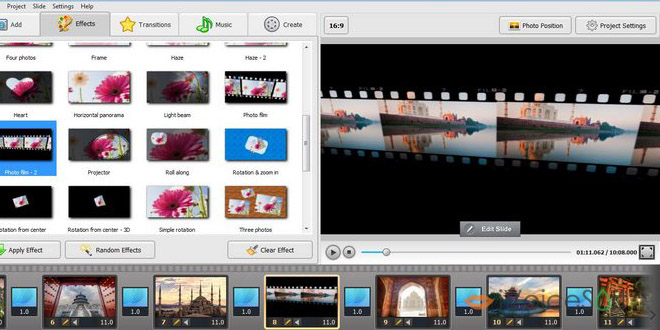
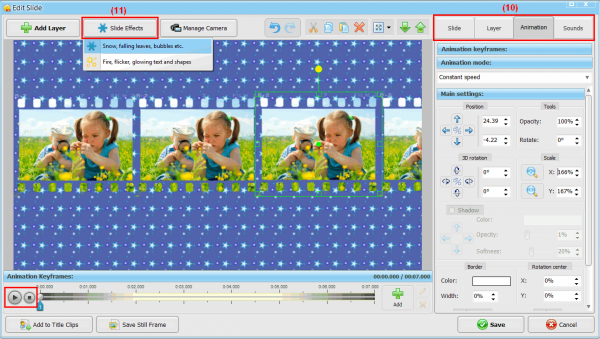
Step 3: Customize slide animations
Double click on the photo you want to customize.
- Click 4 main tabs (10) on the right to modify various aspects of the animation (Slide, Layer, Animation and Sounds).
- To add ore visual effects to the photos, click Slide Effects (11).
Remember to preview the effects at the bottom to continuously see the current state of the project. When you’re done, click Save.
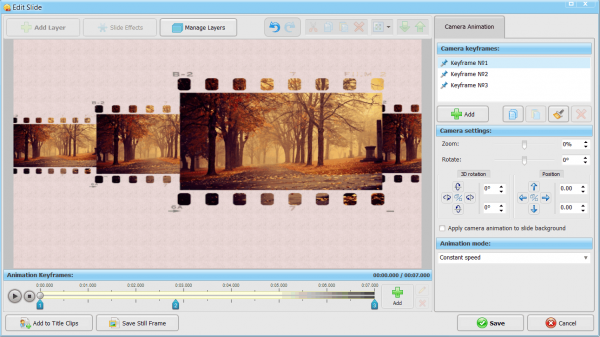
Step 4: Discover the 3D camera
One of the unique features of SmartSHOW is the 3D camera which enables you to apply animation to objects to the whole slides. Add keyframes the same way you did in the layers animation step. The settings you can adjust are as follows: apply zoom in or zoom out, experiment with the rotation angle (both simple and 3D), and of course, adjust the initial and the final position of the “camera eye”.