Recording screen is a nice feature that all DIY bloggers want to have to share cool recordings with their friends and users. Filmora is not only able to edit and add spectacular effects to your video files, but also can record PC screen to make tutorial videos and gifs for your own purpose. This article will show you how simple it is to record PC screen using Filmora from Wondershare.
$69.99 for a lifetime license. But you can buy Filmora with coupon discount (Only $56.69) from Wondershare discount page or download free trial above (The trial version is functionally the same as the paid version except there is a watermark in the new output files.).
Other edition, Filmora 1-year license: $39.99 discount to only $37 (Discount link)
In this article:
Step 1: Run the program
Run Filmora >> Full Feature Mode.
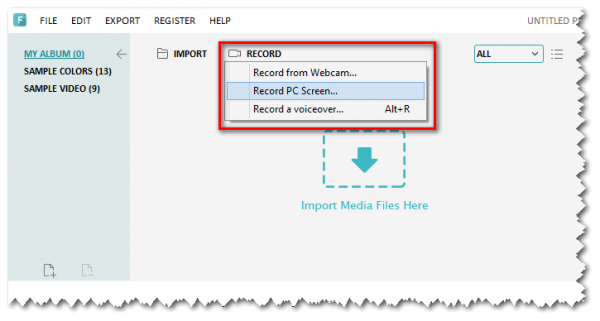
On the main panel, click Record >> Record PC screen…
Step 2: Set up Filmora screen recorder
In Wondershare Screen Recorder, select the type of screen you would like to record (e.g.: Full Screen, Custom, Target Window).
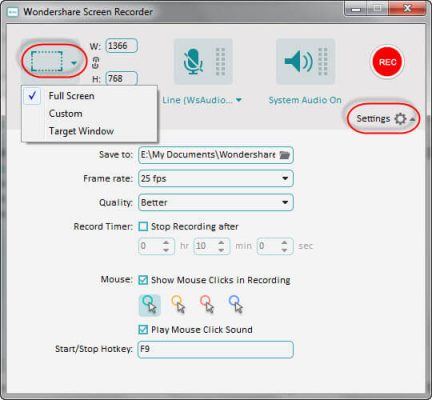
Click Settings to configure the file further (optional). Plus, remember to choose Location Folder, Quality, Record Timer before you start the process.
Step 3: Start recording PC screen
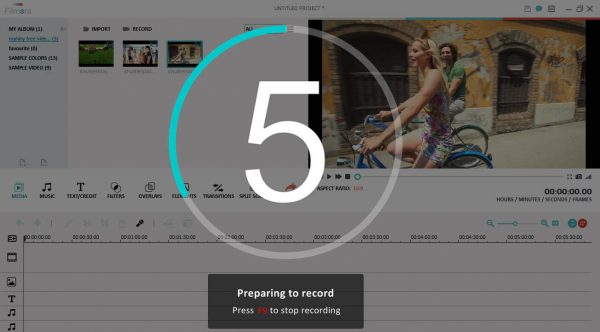
When everything is set, click REC button, there’ll be a countdown timer (5 seconds). After that, press F9 to stop recording progress. The output video will be dropped in selected location folder immediately.
Tip: F9 is the default hotkey set by Filmora, you can freely customize your own hotkeys in Wondershare Screen Recorder window in previous section.
For more, check-out how to Add Text and Introductions to Your Video Clip with Filmora now.
 iVoicesoft.com Media Software Review

