If you realize one or several files in your driver disappeared for no reason, time is of the essence. The issue is that it is not recommended to use the same driver for saving new information or data. But don’t panic! There’s still a way to recover your files. And this is an effective tip that we would like to share with my fellow users, both on Mac and Windows.
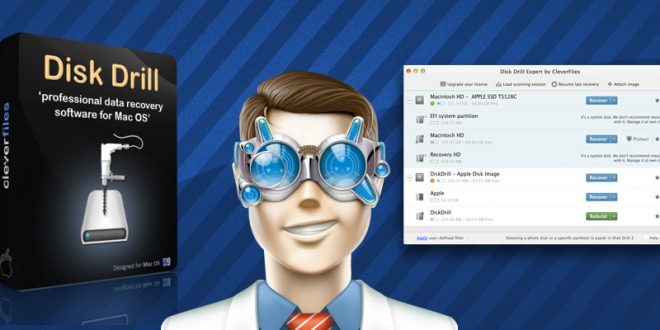
Disk Drill Partition Recovery Software, developed by www.cleverfiles.com is an advanced and effective file retriever and recover for both Windows and Mac OS. The program is developed to solve complicated lost-file-related problems in a simple manner. If you think recovering lost files are almost impossible, you’ll change your mind after checking out Disk Drill.
Notes:
- For Windows: Disk Drill runs on Windows XP, Vista, 7, 8, 10 and recovers up to 100MB for free.
- For Mac: It is compatible with OS X 10.6 and later.
- Pro version costs $89 (for all OS).
Let’s get started!
In this article:
Step 1: Install Disk Drill on your computer
To use Disk Drill to make partition recovery, you need to have the tool installed on your computer first:
Tip: The scanning features of Disk Drill Basic are free, so it’s always worth checking to see if it is still there. You only need to purchase Disk Drill Pro if the scan finds files that you wish to recover.
Here is a quick video tutorial on how to install the tool (for Mac)
Step 2: Launch Disk Drill
Double-click on Disk Drill icon on you Windows desktop. For Mac, go to Applications folder and double-clicking on the Disk Drill icon.
If you’re first time user, you may be asked a few questions to allow the tool to be open and configured correctly. We recommend that you check the first 3 boxes and leave the last one unchecked to skip the tour (if you do not wish to see the tour). Then, click Next.
Enter your admin password to permit Disk Drill to scan your driver.
When asked to upgrade its version, select Stay With Disk Drill Basic (which is free). You can decide whether or not to upgrade after you see the scan results.
Step 3: Scan your drives
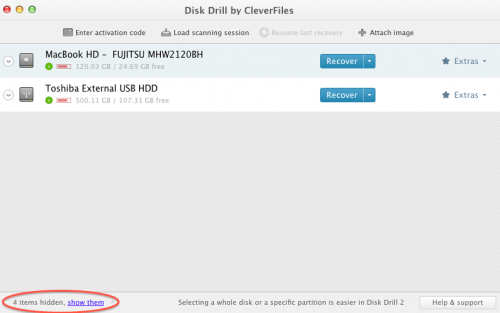
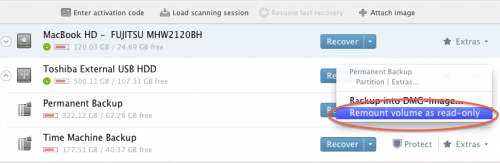
Once the tool is open and ready to use, you will instantly see a list of drives and devices available for scanning. If the files you want are not included there, check bottom-left of the panel for hidden items. Click show them to see the full list.
If your drive has partitions, click on it to see all separate partitions.
Click Extras >> Remount Volume As Read Only from which you will see a padlock symbol appear next to the volume name. This optional yet highly recommended step is meant to prevent your disk from being assessed by other applications during the recovery process. After that, click Recover button.
Notes:
- Recovery process may take a while, depending highly on how large your hard drive or disk is.
- If no files are found, you’re advised to Troubleshoot Scan Results.
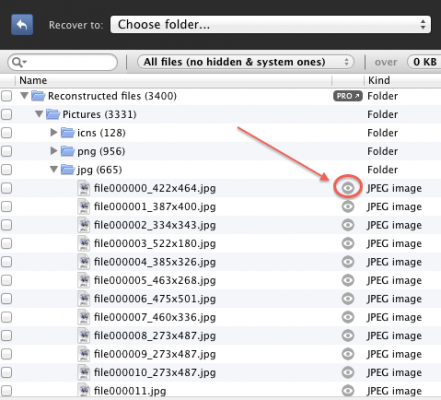
Step 4: Preview selected files
This step is very helpful for those considering upgrading Disk Drill. Previewing is a great way to make sure the files are actually important to you and also whether they’re recoverable. Some files might be corrupted before they disappear so even if you see their names, it doesn’t guarantee that they’re recoverable.
In the list of results, click the “eye” icon to preview the file.
There are three possibilities for the preview:
- Looks good: The file should be recoverable. Still, make sure you preview the entire file and not only the beginning.
- Looks Messed Up or Is Missing Parts: The file cannot be totally recovered because parts of the file may be error/corrupted which means only part of it can be played. Simply put, retrieved file won’t be perfect.
- No Preview Appears: This means only file names appear without capability to be recovered.
If you have identified files that you wish to recover, it’s time to upgrade to Disk Drill PRO.
Good luck!