
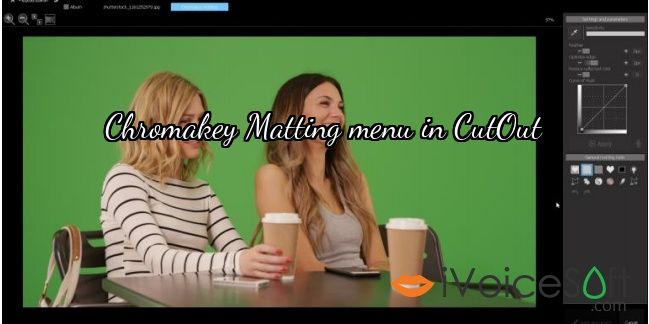
In order to crop objects with a monochrome green or blue background in CutOut 9 professional using chromakey matting, select the desired image in album mode and click on ChromaKey in the menu bar. The selected image should now be opened in the Chromakey Matting menu as follows:
On the right side of the screen, you now have various matting setting options at your disposal that can be used to optimize the release result.
In order to crop the persons on the picture, i.e. to extract the green background, first click on the pipette symbol: Then click on a spot in the image that corresponds to the background color, in this case a green area.
Using the pipette tool, gives CutOut 9 professional the information which color corresponds to the background.
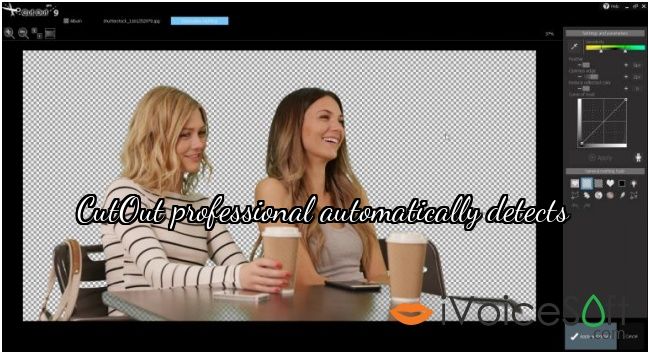
CutOut 9 professional automatically detects which areas need to be extracted from the image and which need to be retained.
The result is displayed directly, whereby the distant background is displayed transparently (gray-white grid-pattern).
Since the green background in this picture stands out very clearly from the object (the persons), the matting result is already quite optimal and hardly needs any further improvement.

However, one does not always have to deal with such clearly distinguishable background colors, so that the matting result should often still be improved. In this case, please turn to the chapter Chromakey Matting Optimization, which explains the other tools of the Chromakey Matting menu. To create the displayed matting result as a separate layer in CutOut 9 professional and then edit or save it, click Apply in the Chromakey-Matting menu.
As a result, the Post-Matting Menu will appear presenting you with an array of options on how you can proceed with the cropped object.
To have your cropped object remain as its own layer, please select the option Duplicate Layer.
Further explanations regarding the remaining Menu options can be found in the chapter titled The Post Matting Menu.
The matting result is now available in the menu bar on the right in the Layers area.
In order to recognize the matting result, however, you must hide the layer of the original image that still contains the background.
You can do this by clicking on the “eye symbol” next to the layer.
Get the CutOut PRO with discount from our Franzis Software coupon page